
https://www.siliconrepublic.com/business/anthropic-ipo-october-reuters-listing-2trn
#siliconrepublic
https://www.siliconrepublic.com/b...
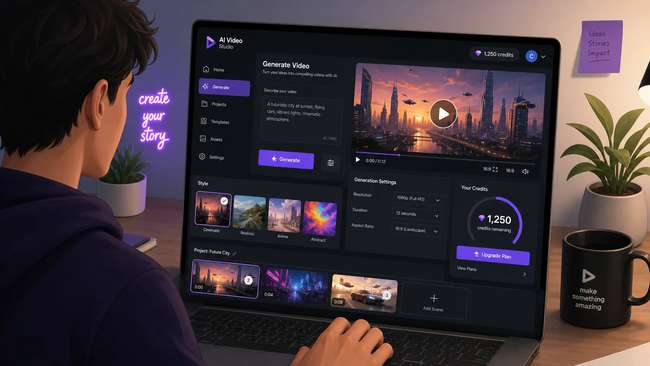
For visual creators, free credits are best used to answer one production question. Choose a representative shot, hold the prompt and references stable, record the access limits, and score usable seconds instead of burning the allowance on unrelated prompts.
Disclosure: I work with PixMind.
Key Takeaways
- MiniMax H3 is genuinely free to try, but every free path adds at least one of: watermark, queue, credit expiry, or volume caps.
- The official promotional credits are limited, commonly valid for only a few days, and typically render with a watermark and lower queue priority.
- Third-party aggregators often re-bundle MiniMax H3 access with free credit buckets earned through signups or tasks, sometimes without a watermark, but reliability and availability change frequently.
- PixMind offers MiniMax H3 through its AI video tool and the API platform, with starter credits for new accounts and no watermark on output. Check the current plan for the exact amount.
- For any real production volume, paid usage at $0.13/sec (2K) or $0.09/sec (768P) is cheaper than the time cost of chasing expiring free credits.
What "Free" Actually Means for MiniMax H3
Free access to a frontier video model is never quite free. The model still costs real compute to run, so whoever hosts the generation has to recover that cost somewhere. Understanding the four levers providers pull lets you read any "free MiniMax H3" offer in seconds instead of learning the catch mid-project.
Credits. Almost every free path issues credits rather than unlimited generations. Credits are denominated in seconds of output, generations, or points, and they run out. The official credits are commonly a few hundred units valid for only a few days. Aggregator platforms usually hand out credits in exchange for signups, daily logins, or task completion, and the buckets refill on the provider's schedule, not yours.
Watermarks. Free tiers commonly burn a logo or brand mark into the output. The watermark is the provider's advertising and the reason the tier can exist at zero cost. The mark is usually positioned to be hard to remove cleanly, and removing it from a finished clip is a terms-of-service gray area at best.
Queues. Free users typically sit behind paid users in the render queue. During peak hours a 5-second clip that should take a minute of compute can take ten or twenty minutes of waiting. For a one-off test this is fine. For a client deliverable on a deadline it is a project risk.
Expiry. Credits expire. The official promotional credits are widely reported as valid for only a few days from issue. Aggregator credits often have similar or shorter windows. If you claim a bucket of credits and come back next weekend, they may already be gone.
The honest summary: free MiniMax H3 is the right tool for a first test, a portfolio piece, or a hobby session. It is the wrong tool for any work where a missed deadline, a watermark on a client deliverable, or a mid-project credit expiry would cost more than the paid clip would have. The rest of this guide walks through each option, then gives a clear rule for when to switch.
MiniMax H3 in Action: Real Free-Credit Examples
Before the options, watch what a free-credit stack actually unlocks. The video below walks through a full free-access workflow for MiniMax H3, showing how to combine promotional credits and starter offers into enough render budget to test the model end to end.
https://www.youtube.com/embed/0K-UgMFjVQI" width="560" height="315" title="How to create free unlimited AI videos 2026 full guide" frameborder="0" allow="accelerometer; autoplay; clipboard-write; encrypted-media; gyroscope; picture-in-picture" allowfullscreen> A full guide shows how to stack free credits and starter offers into enough MiniMax H3 render budget for a complete test project.
Option 1: Official Promotional Credits
The most direct free path is the official product, where MiniMax issues promotional credits to new and sometimes returning users. This is the closest you can get to the canonical model, on the canonical infrastructure, without paying.
The mechanics are simple. You sign up on the official product, claim the welcome credit allocation, and generate. The model surface is the full MiniMax H3, so you get native 2K output, synchronized stereo audio, and the 12-reference multimodal input budget on the same checkpoint paid users run. Nothing about the model itself is downgraded.
The catch is that the credits are deliberately small and short-lived. Community reports consistently describe the welcome allocation as a few hundred credits valid for only a few days from issue. Free-tier renders also typically carry a watermark and sit in a lower-priority queue behind paid users. None of this is hidden, but it is easy to miss in the signup flow.
Use the official credits when you want to do any of the following:
- Confirm the model can actually produce the kind of shot you need before you pay anyone for it.
- Run a side-by-side comparison against another model on identical prompts.
- Produce a single portfolio or test clip where a watermark is acceptable.
Do not use the official credits when you need clean output, a firm deadline, or more than a handful of clips. The watermark rules it out for client work, and the short expiry window makes it unreliable for anything spread across multiple sessions. MiniMax H3 character consistency guide
Option 2: Third-Party Aggregator Platforms
A second free path runs through third-party aggregator platforms that re-bundle MiniMax H3 access alongside other video models. These services buy API capacity from MiniMax or a gateway and resell it under their own brand, often funding a free tier through ads, signups, or task completion.
A controlled trial reveals more than the word “free.” Compare watermarks, queues, resolution, control, retries, and repair time before choosing the route for paid production.
Originally published by the PixMind Editorial Team
For visual creators, free credits are best used to answer one production question. Choose a representative shot, hold the prompt and references stable, record the access limits, and score usable secon...
https://www.essentiallysports.com/tennis-news-bizarre-scene-unfolds-as-maintenance-worker-interrupts-atp-pro-mid-serve/
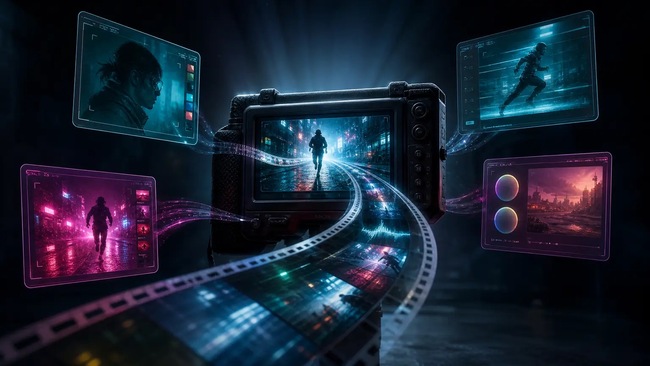
For visual creators, the best workflow is the one that preserves intent while making each decision easy to inspect and revise. This edition emphasizes those practical controls. A reference video is a sequence of production choices, not one giant prompt; preserving those choices shot by shot is what makes the result reusable.
Disclosure: I work with PixMind.
A reference video is rarely one prompt. It is a sequence of shots, and each shot has its own subject, action, camera movement, lighting, sound, and transition. This guide shows how to turn that sequence into structured, reusable AI video prompts without flattening the whole clip into a vague summary.
You will learn a practical video prompt reverse-engineering workflow, a timestamped output schema, six scene breakdowns, and a checklist for converting the result into Veo, Runway, Seedance, or another target model.
Want the first draft automatically? Upload a clip to PixMind Video to Prompt, then use this guide to inspect and refine the shot list.
Part 1: Core Concepts & Parameter Cheat Sheet
What Is Video Prompt Reverse-Engineering?
Video prompt reverse-engineering means analyzing a clip shot by shot and converting its visible and audible choices into structured production language. Instead of guessing the original creator's prompt, you document what is actually present: subject, action, environment, framing, camera motion, lighting, color, sound, and transitions.
The result is not a forensic copy of the source. It is an editable creative specification you can reuse with a different subject, product, location, or target video model.
The Five-Layer Prompt Structure
Every strong video prompt is built from five stacked layers:
Layer What It Captures Example Descriptors
| Subject | Who or what is in the frame | "a woman in a white linen dress"
| Action / Motion | What's moving and how | "walking slowly through tall grass"
| Environment | Location, time of day, weather | "golden-hour meadow, soft wind"
| Camera | Shot size, movement, lens character | "wide tracking shot, slight lens flare"
| Style / Mood | Aesthetic direction, color grade, tone | "cinematic, warm tones, film grain"
Core Parameter Cheat Sheet
Parameter Starter Default Advanced Options
| Shot size | Medium shot | Extreme close-up / aerial
| Motion speed | Normal speed | Slow motion / time-lapse
| Lighting | Natural daylight | Golden hour / neon backlight
| Color grade | Neutral | Teal-orange / desaturated
| Camera movement | Static | Dolly / handheld shake
| Duration hint | 5–8 seconds | 15–30 seconds
| Audio hint | None | Ambient sound / dialogue
| Aspect ratio | 16:9 | 9:16 (vertical) / 1:1
Core principle: Start with the details that materially change the shot, then add one control at a time. A short, internally consistent prompt is more useful than a long prompt containing competing camera, lighting, or action instructions.
A Shot-by-Shot Video Prompt Output Schema
For multi-shot clips, create one record per shot instead of one paragraph for the whole video:
Field What to Record Example
| Timecode | Start and end of the shot | 00:04–00:07
| Subject | Visible person, object, or product | Runner in a red windbreaker
| Action | Subject and environmental motion | Runner turns; rain blows left to right
| Camera | Shot size, angle, and movement | Low-angle medium shot, handheld tracking
| Lighting and color | Source, direction, contrast, palette | Cool overcast key, muted blue shadows
| Audio | Dialogue, ambience, effects, music | Footsteps, rain, low bass pulse
| Transition | How the next shot begins | Whip-pan cut on movement
This schema directly addresses scene-by-scene extraction queries such as “AI prompt from clip to each scene.” It also makes errors easy to spot: if a tool labels a locked shot as a dolly, you can correct one field without rewriting the entire prompt.
Part 2: Scene Walkthrough — Cinematic Nature Landscape
Goal
You find a travel documentary clip: a mist-covered mountain range at dawn, a slow aerial pull-back, no people. You want to recreate that atmosphere.
✅ Reference Visual Example
(Illustrative example — not an actual PixMind model output.)
Recommended Prompt Template
Aerial drone shot slowly pulling back from a mist-covered mountain ridge at dawn.
Pale blue and soft orange light filters through low clouds. Pine trees visible below.
No people. Cinematic color grade, anamorphic lens flare, 4K quality.
Mood: serene, vast, slightly melancholic.
Duration: ~8 seconds.
Step-by-Step
- Mute the audio and watch the clip three times. Focus only on what the camera is doing — ignore the subject content for now.
- Identify the dominant direction of movement. In this case: upward + backward (pull-back).
- Name the light source and its quality. Dawn = low angle, diffused, warm-to-cool gradient.
- Compress the style into 2–3 adjectives. "Cinematic, serene, vast."
- Paste your notes into PixMind's Video-to-Prompt tool to auto-extract a draft, then refine it manually.
⚠️ Common Mistake
Don't write the entire scene description as one continuous run-on sentence. Models like Veo 3 perform noticeably better when subject, motion, and style are separated with line breaks or commas — burying everything in a single paragraph degrades output quality.
Part 3: Scene Walkthrough — Product Advertisement
Goal
A 10-second beauty ad: a product on a marble surface, slow push-in, soft studio lighting, pastel background. You want to distill a reusable product video template.
✅ Reference Visual Example
(Illustrative example — not an actual PixMind model output.)
Recommended Prompt Template
Close-up slow zoom-in on a [product name] bottle placed on white marble surface.
Soft diffused studio lighting from upper-left. Pastel pink background, out of focus.
Subtle water droplets on the product. No hands, no people.
Elegant, minimal, luxury aesthetic. Smooth camera movement, no shake.
5-second clip, 16:9.
Step-by-Step
- Pause on three key frames in the reference ad: the opening, the midpoint, and the end.
- Observe what changes between frames. Here, only the camera distance changes (push-in) — the background and lighting remain constant throughout.
- Identify brand-specific elements and swap them out. Replace the product name and color palette with your own.
- Test with PixMind's Seedance 2 AI video generator — its product ad scene handling is specifically optimized for this kind of controlled studio aesthetic.
⚠️ Common Mistake
Avoid vague luxury descriptors like "high-end" or "premium." Instead, describe the visual evidence of luxury: marble, soft shadows, minimal composition, slow movement. Models respond to concrete visual signals, not abstract quality labels.
Part 4: Scene Walkthrough — Urban Street Scene with People
Goal
A street photography-style video: a busy intersection at night, handheld camera, neon lights reflecting off wet pavement, pedestrians moving quickly through the frame.
✅ Reference Visual Example
(Illustrative example — not an actual PixMind model output.)
Recommended Prompt Template
Handheld medium shot of a busy city intersection at night, wet pavement reflecting
neon signs in red, blue, and yellow. Crowds of people walking quickly in multiple
directions. Slight motion blur on pedestrians. Shallow depth of field.
Urban, gritty, high-contrast. Tokyo or New York aesthetic.
Camera: slight sway, no stabilization. 6–8 seconds.
Step-by-Step
- List every light source in the scene. Neon signs, headlights, shop windows — each one is a descriptor.
- Describe crowd density. "Sparse," "moderate," or "dense" gives the model a population signal.
- Capture the camera's personality. Handheld means intentional imperfection — explicitly write "no stabilization" or "slight camera sway."
- Use PixMind's Text-to-Prompt tool to generate a base draft from your scene notes, then layer in camera descriptors manually.
⚠️ Common Mistake
Naming a specific real-world location (e.g., "Shibuya Crossing") helps establish an aesthetic reference, but it can't replace visual description. Models may ignore the place name and render a generic street. Always describe what you see, not just where it is.
Part 5: Scene Walkthrough — Emotional Close-Up Portrait
Goal
A documentary-style close-up: an elderly person's face, natural window light, slow push-in, no dialogue, contemplative atmosphere.
✅ Reference Visual Example
(Illustrative example — not an actual PixMind model output.)
Recommended Prompt Template
Slow push-in close-up of an elderly person's face, mid-60s, neutral expression,
thoughtful and calm. Natural soft light from a window on the left side.
Slight skin texture visible. Background: blurred warm interior.
Documentary style, desaturated color grade, no music cue.
Camera: very slow dolly-in, ultra-stable. 8 seconds.
Step-by-Step
- Identify the emotional anchor. What single word captures the mood? Here it's "contemplative." Write it explicitly.
- Describe the direction and quality of light. "Window light from the left" gives the model far more to work with than "natural light."
- Note what is deliberately absent. No smile, no action, no dialogue — negative descriptors are just as effective as positive ones.
- Test on Veo — based on announced specs, Veo 3/3.1 handles realistic human close-ups with strong lighting fidelity particularly well.
⚠️ Common Mistake
Never specify a real person's face or likeness in a prompt. Describe demographic and emotional characteristics instead. This keeps your prompt within model usage guidelines and produces more consistent results across multiple generations.
Part 6: Scene Walkthrough — Action / Sports Footage
Goal
A surfing video: aerial perspective, athlete riding a massive wave, slow motion, spray sparkling in sunlight, high energy.
✅ Reference Visual Example
(Illustrative example — not an actual PixMind model output.)
Recommended Prompt Template
Aerial shot looking down at a surfer riding a large breaking wave, slow motion.
White water spray exploding upward, backlit by bright midday sun — sparkle effect.
Ocean: deep blue-green. Surfer: small relative to the wave.
High energy, dynamic composition. Camera: hovering drone angle, slight tilt.
Slow motion at 50% speed. 6 seconds, 16:9.
Step-by-Step
- Establish scale relationships. "Surfer appears small relative to the wave" gives the model a compositional anchor point.
- Describe how the light interacts with the scene. Backlit spray creates a sparkle/halo effect — call it out explicitly.
- Specify slow motion with a number. "50% speed" or "120fps playback" is clearer than just writing "slow motion."
- Check the Seedance 2 prompt page for motion-specific prompt structures optimized for high-action scenes.
⚠️ Common Mistake
High-action scenes are where models produce the most artifacts — distorted limbs, incorrect water physics. Adding constraints like "physically realistic water motion" or "no distortion" measurably reduces the likelihood of these issues.
Part 7: Scene Walkthrough — Brand Story / Narrative Short
Goal
A 15-second brand film: a craftsperson's hands shaping clay on a pottery wheel, warm workshop lighting, close-up detail, slow cuts between shots.
✅ Reference Visual Example
(Illustrative example — not an actual PixMind model output.)
Recommended Prompt Template
Close-up of weathered hands shaping wet clay on a pottery wheel, slow deliberate
movement. Warm tungsten workshop light, dust particles visible in the air.
Background: blurred wooden shelves with ceramic pieces.
Tactile, artisanal, warm color grade. Camera: slow macro push-in on hands.
Ambient sound: soft spinning wheel, no music. 10–12 seconds.
Step-by-Step
- Lead with texture descriptors. "Weathered hands," "wet clay," "wooden shelves" — tactile language activates richer visual rendering.
- Add ambient particle details. "Dust particles visible in the air" adds significant depth and realism without increasing compositional complexity.
- Include an audio hint if the model supports it. Both Veo 3 and Seedance 2.5 support native audio generation — "ambient sound: soft spinning wheel" is a valid and effective prompt element.
- Reference the Seedance 2 product ad use cases for brand narrative prompt structures validated against commercial output.
⚠️ Common Mistake
Multi-shot narrative prompts (Shot A → Shot B → Shot C) tend to confuse single-clip models. If you need cuts between shots, generate each clip separately and assemble them in post — don't try to describe an editing sequence inside a single prompt.
Part 8: Universal Prompt Framework & Pre-Submit Checklist
Universal Video Prompt Framework
A structure that works across every scene type:
[Shot size] + [Subject] + [Action/Motion],
[Environment] + [Lighting],
[Camera movement] + [Camera character],
[Style/Color grade] + [Mood],
[Duration] + [Aspect ratio].
Optional: [Audio hint].
Filled-in example:
Wide tracking shot of a woman in a red coat walking through a snowy forest,
late afternoon light filtering through bare trees, soft blue shadows on snow.
Camera: slow lateral track, smooth and stable.
Cinematic, desaturated cool tones, quiet and melancholic.
8 seconds, 16:9. No dialogue.
Prompt Length Reference
Prompt Length Best For Risk
| Under 30 words | Quick tests, style exploration | Too vague, inconsistent output
| 40–80 words | Most production use cases | Sweet spot
| 80–120 words | Complex multi-element scenes | Possible element conflicts
| 120+ words | Rarely appropriate | High contradiction risk
Pre-Submit Checklist
Run through this before submitting any video prompt:
- [ ] No conflicting motion instructions — e.g., "handheld" and "perfectly stable" cannot coexist in the same prompt.
- [ ] Light source is named — "natural light" is weaker than "golden-hour sidelight from the right."
- [ ] Camera movement is specified — static, dolly, pan, tilt, handheld, aerial: pick one and state it clearly.
- [ ] Subject scale relationships are defined — especially important in landscapes, action scenes, and crowd shots.
- [ ] Style adjectives are visual, not abstract — "warm tones, film grain" beats "cinematic masterpiece."
- [ ] Duration is included — models use duration to calibrate motion pacing and transitions.
- [ ] No real person's likeness is referenced — describe physical and emotional characteristics, not a specific identity.
- [ ] Audio hint added for models that support it — don't leave the audio field blank in Veo 3 or Seedance 2.5 prompts.
Quick Reference: Recommended PixMind Tools by Step
Step Task Recommended Tool
| 1 | Upload footage, get a prompt draft | Video-to-Prompt
| 2 | Refine scene notes into a polished prompt | Text-to-Prompt
| 3 | Generate video from your final prompt | Veo or Seedance 2
| 4 | Go deeper on prompt strategy | YouTube Video-to-Prompt Guide
Part 9: Putting It All Together
Text-to-prompt is fundamentally a translation skill — converting visual information into the specific vocabulary that AI models are trained to understand. The more precisely you describe what you see (rather than what you feel), the more consistently the model can reproduce it.
Start with the five-layer framework, use the universal template as scaffolding, and run the checklist before every submission. Over time, you'll build a personal library of tested prompt templates that can be adapted for any new project.
The fastest way to accelerate that process: use PixMind's Video-to-Prompt tool to auto-extract a draft from reference footage, then apply the techniques in this guide to refine it manually. The combination of machine extraction and human refinement consistently outperforms either approach on its own.
Save the strongest result together with its prompt structure and reference choices. That small archive becomes far more useful than a gallery with no record of how the work was made.
Originally published by the PixMind Editorial Team https://www.pixmind.io/posts/text-to-prompt-guide
For visual creators, the best workflow is the one that preserves intent while making each decision easy to inspect and revise. This edition emphasizes those practical controls. A reference video is a ...

For visual creators, the best workflow is the one that preserves intent while making each decision easy to inspect and revise. This edition emphasizes those practical controls. Runway prompts become easier to control when visible content, subject motion, camera motion, and scene motion are written as separate decisions.
Disclosure: I work with PixMind.
This guide turns Runway's current official prompting principles into a practical workflow: describe visible action, separate subject motion from camera motion, use positive phrasing, and iterate one control at a time.
Why Prompt Quality Makes or Breaks Runway Output
Runway's current guidance favors direct, visual language. For text-to-video, describe both what appears in the frame and how it moves. For image-to-video, let the input image establish appearance and composition while the text prompt concentrates on motion.
The runway-video-prompt-generator on PixMind is designed to bridge that gap — it turns your rough ideas into structured, model-ready prompts without requiring you to memorize syntax.
Understanding why the generator makes the choices it does will help you override defaults confidently and push results further.
Section I: Runway Prompt Parameter Cheatsheet
Before diving into scenarios, here is the core parameter vocabulary Runway responds to. Think of this as your reference card.
Core Parameter Table
Parameter What It Controls Example Values
| Subject | The main actor or object in the frame | "a woman in a red trench coat", "a rusted cargo ship"
| Action | What the subject is doing | "walks slowly through fog", "rotates 360°"
| Camera Motion | How the virtual camera moves | slow push-in, orbit left, static, handheld shake
| Lens / Focal Length | Depth of field and compression | 24mm wide, 85mm portrait, macro
| Lighting | Mood and source of light | golden hour backlight, neon fill, overcast diffuse
| Color Grade | Tonal palette | desaturated teal-orange, warm analog film, high-contrast monochrome
| Atmosphere | Environmental texture | heavy fog, light rain, dust particles, heat shimmer
| Duration Hint | Pacing signal | slow motion, real-time, time-lapse
| Style Reference | Visual shorthand | cinematic, documentary, lo-fi VHS, studio product
The Core Prompt Philosophy
Runway's official Gen-4 and Gen-4.5 guidance recommends starting simple and adding detail only when it improves control.
- Text to video: describe the visible scene plus subject, environment, and camera motion.
- Image to video: avoid redescribing the entire input image; focus on the motion you want.
- Use positive phrasing: write “locked camera” instead of “no camera movement.”
- Iterate one variable at a time: add camera motion, scene motion, or style in separate tests so you can see what changed.
A useful text-to-video starting structure is:
[Visible subject and environment]. [Subject action].
[Camera motion]. [Scene motion]. [Optional visual or motion style].
Section II: Scenario — Cinematic Portrait Walk
The Goal
A character walking through an urban environment with a film-like quality. This is one of the most requested use cases for creators building short films or social reels.
Example Output Note
⚠️ The following prompt template is illustrative, based on announced Runway model behavior and community-reported results. It is not a direct model test output from PixMind's servers.
Recommended Prompt Template
A young woman in a long olive coat walks slowly through a rain-slicked Tokyo alley at night,
slow push-in camera, 50mm lens, neon reflections on wet pavement,
shallow depth of field, warm amber and cyan color grade, cinematic 2.39:1 aspect ratio
Hands-On Case
Start with the template above in the runway-video-prompt-generator. In the "Subject" field, swap "young woman in a long olive coat" with your character description. Change "Tokyo alley" to your location. Keep the camera and lighting block intact — those are the lines doing the heaviest cinematic lifting.
⚠️ Pitfall Warning
Do not stack two camera motions. Writing "slow push-in and pan right" confuses the model. Pick one motion per prompt. If you need a compound move, generate two clips and cut between them in post.
Section III: Scenario — Product Hero Shot (Ecommerce)
The Goal
A floating product — perfume bottle, sneaker, gadget — rotates elegantly against a clean background. Essential for ecommerce brands.
Example Output Note
⚠️ Prompt template below is an illustrative example based on typical Runway product-video behavior, not a verified PixMind model output.
Recommended Prompt Template
A luxury glass perfume bottle slowly rotates 360° on a white marble surface,
orbit camera motion, studio three-point lighting, soft shadows,
macro lens, clean white background, photorealistic product commercial style
Hands-On Case
Paste this into the generator, then use the "Atmosphere" override field to add light mist if you want a premium fragrance feel. For tech products, swap soft shadows with dramatic side lighting, specular highlights. The generator will auto-complete the style tag — accept it unless you have a specific reference.
For deeper ecommerce prompt work, the AI product background generator on PixMind pairs well here: generate a still first, then bring it into Runway for motion.
⚠️ Pitfall Warning
Avoid describing the product's internal mechanism. Runway will attempt to visualize it literally and produce glitchy geometry. Describe only what a camera would see from the outside.
Section IV: Scenario — Nature & Landscape Time-Lapse
The Goal
Clouds rolling over a mountain range, tide coming in, flowers blooming — atmospheric time-lapse content for documentaries, backgrounds, or ambient loops.
Example Output Note
⚠️ Illustrative prompt template; not a direct model output from PixMind.
Recommended Prompt Template
Dramatic storm clouds rolling over snow-capped Dolomite peaks,
static wide shot, 24mm lens, golden hour side light fading to blue dusk,
time-lapse motion, cool desaturated palette, epic documentary style
Hands-On Case
In the runway-video-prompt-generator, set the Duration Hint to time-lapse. This single tag shifts the model's motion prediction toward compressed-time movement. Then lock the camera to static — a moving camera on a time-lapse usually produces unstable, nauseating results.
Swap "Dolomite peaks" for any biome: Sahara dunes, Amazon canopy, Arctic tundra. The lighting block stays the same.
⚠️ Pitfall Warning
Do not add characters to landscape time-lapses. A human figure in a time-lapse prompt forces the model to choose between realistic human motion and compressed time — it cannot do both, and the figure will morph unnaturally.
Section V: Scenario — Abstract / Motion Graphics Loop
The Goal
Looping abstract visuals for music videos, stage backdrops, or social media content. No subject, pure visual texture.
Example Output Note
⚠️ Illustrative prompt template; not a direct model output from PixMind.
Recommended Prompt Template
Fluid iridescent liquid morphing into geometric crystalline shapes,
slow zoom-out, macro lens, studio backlight, deep black background,
rich jewel tones — sapphire, emerald, gold — seamless loop, abstract art style
Hands-On Case
The phrase seamless loop is a strong signal to Runway to match the first and last frames. It does not guarantee a perfect loop, but it significantly improves the chance. After generation, use the video-to-prompt tool on PixMind to reverse-engineer the visual language of a successful take, then iterate from that extracted prompt.
⚠️ Pitfall Warning
Avoid color names that are also object names. Writing coral can produce literal coral reef imagery. Write warm salmon-pink instead to stay purely in color territory.
Section VI: Scenario — Dialogue / Talking Head
The Goal
A character speaks directly to camera — for explainer videos, social content, or narrative scenes. This is technically demanding for any AI video model.
Example Output Note
⚠️ Illustrative prompt template; not a direct model output from PixMind.
Recommended Prompt Template
A middle-aged male scientist in a white lab coat speaks calmly to camera,
static shot, 85mm portrait lens, soft key light from screen-left,
neutral grey background, shallow depth of field, documentary interview style,
subtle natural head movement, no exaggerated gestures
Hands-On Case
The phrase no exaggerated gestures acts as a negative constraint and tends to reduce the wild arm-waving Runway sometimes introduces. Pair this with subtle natural head movement to prevent the uncanny frozen-face look.
For character consistency across multiple clips, check out the AI video character consistency guide — it covers how to carry a character's appearance from shot to shot.
⚠️ Pitfall Warning
Do not describe lip sync in the prompt. Runway's video model does not perform phoneme-accurate lip sync from text prompts. Describing speech will produce a character whose mouth moves randomly. Use a dedicated lip-sync layer in post-production.
Section VII: Scenario — Action & Sports
The Goal
High-energy sequences: a skater landing a trick, a sprinter crossing a finish line, a surfer dropping into a wave.
Example Output Note
⚠️ Illustrative prompt template; not a direct model output from PixMind.
Recommended Prompt Template
A professional skateboarder lands a kickflip on a sun-drenched LA street,
low-angle tracking shot, 35mm lens, harsh midday sun, long shadows,
slow-motion at 120fps aesthetic, high contrast warm grade, sports commercial style
Hands-On Case
Low-angle tracking shot is the single most effective camera cue for making action feel powerful. Combine it with slow-motion to give the model time to render motion blur correctly. In the runway-video-prompt-generator, use the "Energy" slider if available — set it to high for action sequences.
For inspiration on what other video generators do with action content, the best AI video generators 2026 roundup shows how Runway compares to Veo 3, Kling, and Seedance 2.5.
⚠️ Pitfall Warning
Avoid describing multiple athletes simultaneously. The model struggles to track more than one fast-moving human body. Feature one subject per clip; composite in post if you need a crowd.
Section VIII: Scenario — Architectural & Interior Walk-Through
The Goal
A smooth camera glide through a space — a modernist house, a cathedral, a sci-fi corridor. Used heavily in real estate, game trailers, and architectural visualization.
Example Output Note
⚠️ Illustrative prompt template; not a direct model output from PixMind.
Recommended Prompt Template
Camera glides slowly through a minimalist Japanese living room at dawn,
smooth dolly forward, 24mm wide lens, soft natural window light from the right,
warm wood tones, white walls, sparse furniture, architectural photography style,
no people, photorealistic
Hands-On Case
No people is essential here — even a hint of human presence in the prompt can cause Runway to insert a blurry figure in the background. The phrase photorealistic combined with architectural photography style pushes the model toward sharp geometry rather than painterly softness.
To generate a matching still image for the same space first, try the AI image generator on PixMind, then use the still as a reference frame in Runway's image-to-video mode.
⚠️ Pitfall Warning
Do not describe furniture in excessive detail. Listing every piece of furniture ("a teak coffee table, two linen sofas, a ceramic vase, a floor lamp…") overloads the spatial budget of the prompt. Describe the dominant material palette and let the model fill in the specifics.
Section IX: General Prompt Framework & Pitfall Checklist
The Universal Runway Prompt Framework
Use this as your fill-in-the-blank scaffold every time:
[SUBJECT] + [ACTION/STATE],
[CAMERA MOTION], [LENS],
[LIGHTING SOURCE and QUALITY],
[ATMOSPHERE/ENVIRONMENT],
[COLOR GRADE],
[STYLE REFERENCE],
[NEGATIVE CONSTRAINTS if needed]
Example filled in:
A lone lighthouse keeper climbs spiral stairs with a lantern,
slow upward tilt, 35mm lens,
warm lantern glow against cold stone walls,
heavy fog outside the windows,
muted teal and amber grade,
cinematic period drama style,
no modern objects
Pitfall Checklist
Run through this before every generation:
# Check Why It Matters
| 1 | ✅ Visible subject and environment | Gives text-to-video a concrete scene
| 2 | ✅ Subject motion is explicit | Defines what the subject does
| 3 | ✅ Camera motion is explicit | Separates camera behavior from subject action
| 4 | ✅ Scene motion is included when relevant | Covers wind, dust, water, crowds, and other environmental movement
| 5 | ✅ Positive phrasing | “Locked camera” is clearer than “no camera movement”
| 6 | ✅ Input image is not redundantly redescribed | Keeps image-to-video focused on motion
| 7 | ✅ One new control per iteration | Makes successful and failed changes traceable
| 8 | ✅ Every instruction is visually observable | Avoids abstract intent the camera cannot show
When to Use the runway-video-prompt-generator vs. Manual Prompting
- Use the generator when starting from scratch, exploring a new visual style, or when your first manual attempt produced unexpected results.
- Write manually when you have a precise technical shot in mind and know the exact camera vocabulary.
- Combine both — let the generator draft, then hand-edit the camera and lighting block for precision.
You can also use the video-to-prompt tool to analyze a reference video you admire, extract its visual language, and feed that extracted language back into the runway-video-prompt-generator for a style-matched starting point.
Choose the Prompt Structure by Runway Workflow
Workflow Let the Input Provide Put in the Text Prompt
| Text to video | Nothing | Subject, environment, visual style, subject motion, scene motion, camera motion
| Image to video | Subject appearance, composition, lighting, color | Subject motion, scene motion, camera motion, timing
| Reference-video iteration | Extracted shot language | Keep the successful motion terms; change one creative variable at a time
If you are starting from a reference clip, use Video to Prompt to extract its shot structure, then rewrite the result with the Runway pattern above.
Wrapping Up
The runway-video-prompt-generator removes the blank-page problem — but the prompts it generates are a starting point, not a final answer. The real skill is knowing which parameters to override and why.
Use the scenario templates in this guide as your library. Bookmark the pitfall checklist. And when a generation surprises you (positively or negatively), use the video-to-prompt tool to decode what actually happened in the visual language — then build from there.
Every strong Runway video starts with a prompt that knows exactly what it wants.
Official references
- Runway: Text to Video Prompting Guide
- Runway: Gen-4 Video Prompting Guide
- Runway: Camera Terms, Prompts, and Examples
Save the strongest result together with its prompt structure and reference choices. That small archive becomes far more useful than a gallery with no record of how the work was made.
Originally published by the PixMind Editorial Team https://www.pixmind.io/posts/runway-video-prompt-generator-guide
For visual creators, the best workflow is the one that preserves intent while making each decision easy to inspect and revise. This edition emphasizes those practical controls. Runway prompts become e...

https://www.sportskeeda.com/aew/news-breaking-chris-jericho-drops-blockbuster-new-day-announcement-amid-aew-rumors
#Sportskeeda
https://www.sportskeeda.com/aew/news-brea...
https://www.essentiallysports.com/ncaa-college-football-news-ryan-day-gets-major-update-from-osu-qb-commit-amid-big-ten-rivals-intense-pursuit-ucla-brady-edmunds/

https://www.modernghana.com/news/1508242/more-than-500-dead-in-dr-congo-ebola-outbreak.html
#modernghana

https://www.thehindu.com/news/cities/chennai/wet-spell-to-temper-summer-heat-across-tamil-nadu-till-mid-may/article70947364.ece
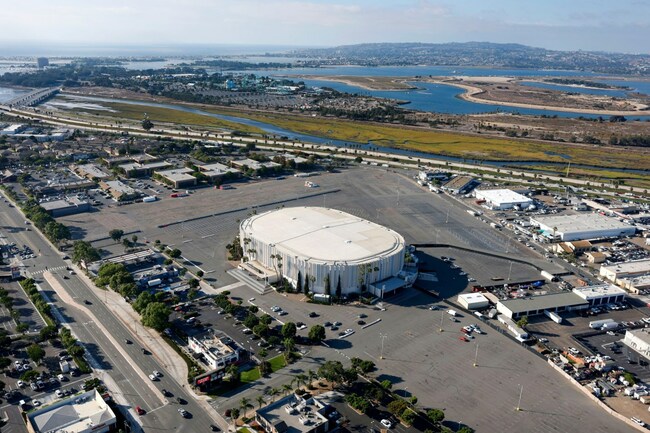
https://www.sandiegouniontribune.com/2026/03/03/letter-disputes-legality-of-midway-rising-environmental-analysis/
#signonsandiego
https://www.san...
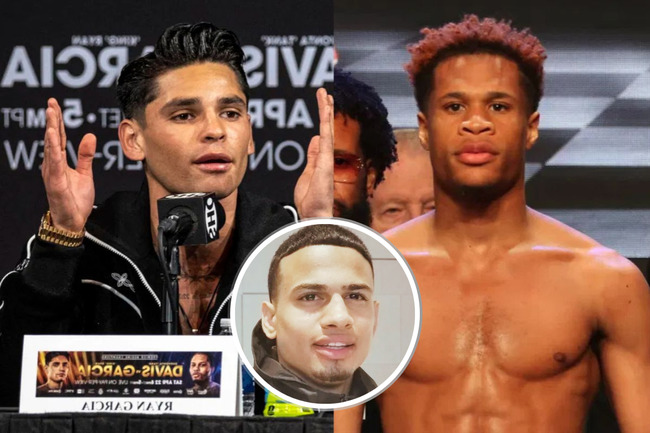
https://www.essentiallysports.com/boxing-news-rolly-romero-calls-ryan-garcia-biggest-coward-in-boxing-amid-devin-haney-rematch-talks/
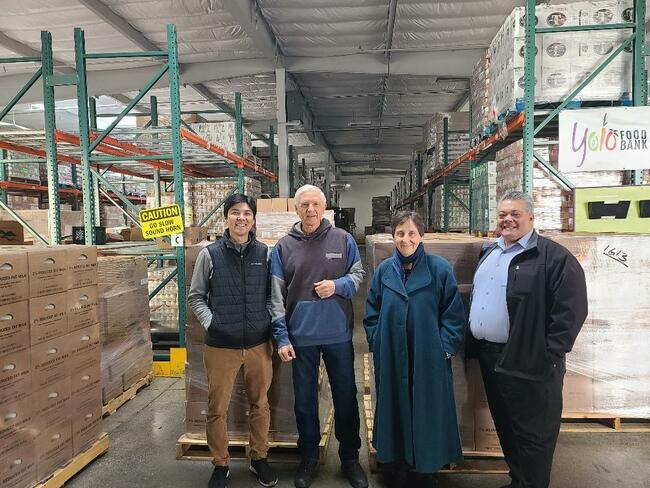
https://www.dailydemocrat.com/2026/02/03/church-of-jesus-christ-of-latter-day-saints-makes-huge-milk-donation-to-yolo-food-bank/
#dailydemocrat
https://www.dailydemocrat.com/2026/02/03/church-...
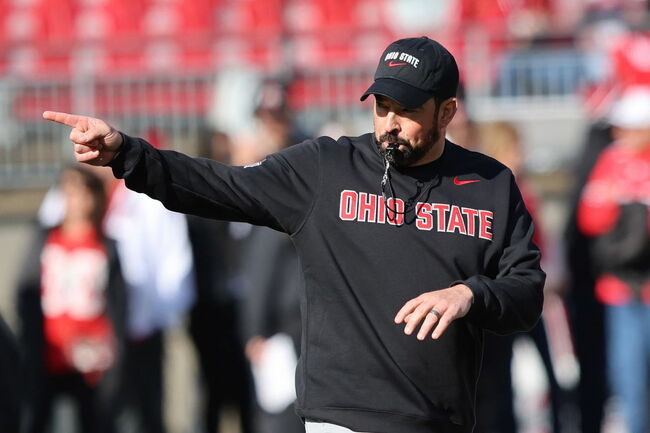
https://www.essentiallysports.com/ncaa-college-football-news-ryan-day-hires-new-ohio-state-coach-to-aid-arthur-smiths-offense/
https://www.essentiallysports.com/ncaa-college-football-news-ryan-day-makes-julian-sayin-stance-very-clear-after-seven-thousand-six-hundred-yd-heisman-hurdle-confirmed/
https://nesn.com/2026/01/nfl-writer-picks-drake-maye-mike-vrabel-for-mvp-coach-of-the-year-awards/
#nesn
https://www.watoday.com.au/national/western-australia/residents-urged-to-flee-immediately-as-bushfire-rages-in-perth-s-east-20251211-p5nmyu.html?ref=rss&utm_medium=rss&utm_source=rss_national
#watoday
https://ww...
https://www.bbc.com/sport/cricket/videos/cj01yy6pvp6o?at_medium=RSS&at_campaign=rss
#BBC

https://www.koreatimes.co.kr/economy/20251205/koreas-current-account-surplus-narrows-in-oct-amid-fewer-working-days
#koreatimes
https://www.koreatimes.co.kr/economy/20251205/kore...
https://www.essentiallysports.com/nba-active-basketball-news-anthony-davis-subtly-calls-out-rob-pelinka-for-putting-career-in-jeopardy-amid-major-personal-change/

https://www.jta.org/2025/10/01/united-states/adl-deletes-glossary-of-extremism-and-hate-amid-flurry-of-right-wing-criticism
#jta
https://www.thehindu.com/news/national/karnataka/children-to-be-given-eggs-in-school-mid-day-meal-with-written-consent-of-parents/article69920604.ece
https://www.thehin...

https://www.orovillemr.com/2025/07/01/magalia-man-arrested-after-deputies-allegedly-find-meth-gun-midday-report/
#orovillemr
https://www.essentiallysports.com/ufc-mma-news-ben-askren-makes-thirty-day-prayer-pact-public-as-wifes-plea-lifts-spirits-amid-health-recovery/

https://www.sportskeeda.com/college-football/news-amid-ohio-state-rumors-2-sec-teams-tough-contest-elite-6-6-225-pound-te-mack-sutter-2026-recruiting-cycle
#Sportskeeda
https:/...

https://www.sportskeeda.com/college-football/news-cfb-insider-weighs-ryan-day-s-pitch-4-automatic-big-ten-qualifiers-amid-massive-changes-college-football-playoff
#Sportskeeda
https://www.sportskeeda.com/college-football/news-cfb-insider-weighs-ryan-day-s-pitch-4-automatic-big-ten-qualif...

https://www.dailyrecord.co.uk/news/scottish-news/fire-crews-still-battling-huge-35207170
https://www.dailyrecord.co.uk/news/scottish-news/...

https://www.sportskeeda.com/basketball/news-what-happened-kristaps-porzingis-joe-mazzulla-s-reveals-celtics-center-exited-game-1-midway
#Sportskeeda
https://www.sportskeeda.co...

https://www.boston.com/news/local-news/2025/03/31/boston-judge-holds-ice-agent-in-contempt-after-man-detained-mid-trial/
#boston

https://www.yahoo.com/news/trump-weighs-sanctions-russia-days-172700090.html

https://www.journal-advocate.com/2025/01/09/windy-conditions-expected-today-with-chance-of-snow-this-morning/
#journal-advocate