
Practical model comparisons, prompting workflows, reference-image techniques and editing methods for generative image and video creators.
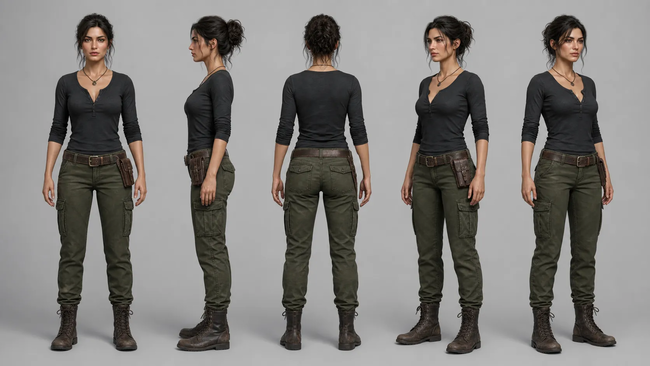
For campaign teams, character consistency is a reference system rather than a lucky prompt. Define one master identity, separate wardrobe and environment inputs, keep the diagnostic prompt stable, and change only one influence variable per test.
Disclosure: I work with PixMind.
Key Takeaways
- Character identity lives in reference files, not in the text prompt. Supply a reference image of the character on every shot and MiniMax H3 keeps the face, hair, and wardrobe consistent without you re-describing it.
- The model accepts up to 12 multimodal reference files per request, spanning images, videos, audio, and text. That budget lets you allocate separate slots to character, outfit, setting, and motion so each reference has one job.
- Native multi-shot consistency is a first-class capability of MiniMax H3. The same subject stays coherent across multiple shots of a scene.
- The reliable workflow is master character, then a clean front-view reference image, then feed that reference on every subsequent shot.
- Community and industry practice points to a reference "influence" setting around 65 to 75 percent, and creators report roughly 95 percent character consistency from a single subject-reference style image.
Why Character Consistency Is the Hard Problem in AI Video
The "different person every shot" failure mode is structural, not a tuning issue. A video model that samples each frame from a text prompt has no memory of the face it generated two seconds ago, let alone the face it generated in the previous clip. Each frame is a fresh draw from a distribution, so features drift. Cheekbones sharpen between cuts. Eye color shifts half a shade. A mole on the left cheek in shot one migrates to the right cheek in shot two. By the time you cut three shots together, the audience reads three different people.
This matters more for story work than for any other format. A landscape shot of a city skyline does not need continuity. A product spin of a perfume bottle does not either. But the moment a character carries the narrative, the audience tracks that face frame by frame. Even small drift reads as a continuity error, and large drift breaks the fiction entirely. Social series, recurring spokespeople, branded characters, multi-shot ads, and short films all hit the same wall.
Re-describing the character in the prompt does not solve it. A paragraph that says "woman in her thirties, short black hair, green eyes, freckles, denim jacket" leaves every visual detail up to the model's interpretation on each render. Two generations from the same prompt produce two different women who both match the description. The prompt is a specification, not a lock. Without a visual anchor, the model will keep inventing.
The fix is to stop specifying the character in words and start supplying it as a reference. That is the entire premise of MiniMax H3's reference system, and the rest of this guide is about how to use it well.
MiniMax H3 complete model guide
How MiniMax H3 Solves Character Consistency
MiniMax H3 tackles the consistency problem with two complementary mechanisms: a multimodal reference system that lets you attach the character as an input, and native multi-shot consistency that keeps the subject coherent across shots of a scene. Together they shift character identity out of the prompt and into the reference layer, where the model can read it instead of imagining it.
Reference files are the identity layer
The core idea is simple. Instead of describing the character, you show it. MiniMax H3 accepts up to 12 multimodal reference files in a single request, drawn from images, videos, audio, and text. When you supply reference images of a character, the model holds the appearance consistent across angles and shots without re-describing it. The reference file is the lock. The prompt just directs the action.
This works because a reference image removes interpretation. There is exactly one face in the reference, not a distribution of faces that match a description. The model's job changes from "invent a person matching these words" to "use this exact person in this new shot". That is a far easier and more stable task.
The budget caps inside the 12-file limit are well documented: up to 9 images, 3 videos, and 3 audio files, combined with the text prompt. The exact split is yours to allocate, which is where most of the craft lives. We cover allocation in the next section.
Native multi-shot consistency
MiniMax H3 treats multi-shot consistency as a first-class capability, meaning the same subject stays coherent across multiple shots of a scene rather than only within a single clip. In practical terms, a character who walks into a room in shot one and sits down in shot three still looks like the same person, because the reference file travels with every shot.
This is what separates a true multi-shot model from a single-shot model that happens to render multiple clips. A single-shot model can hold a face together for five seconds but cannot guarantee the face in clip two matches clip one. A multi-shot model can, because the identity is pinned by the reference, not by the previous frame's residual statistics.
How to allocate the 12-file reference budget
The most common mistake with multimodal references is feeding conflicting inputs. Two character images with different identities, or a motion reference video whose wardrobe contradicts the character reference image, will produce flicker and drift. Each of the 12 slots should have exactly one job.
A reliable allocation pattern for a character-driven sequence:
- Character identity: Two to three images of the same character from different angles (front, three-quarter, profile) if you have them, or one clean front view if you do not.
- Outfit and props: One to two images locking the wardrobe, accessories, or product the character carries, kept separate from the identity reference so changes to costume do not leak into the face.
- Setting and environment: One to two images of the location, lighting, or style, so the character is rendered into a consistent world across shots.
- Motion or performance: One short reference video (optional) that demonstrates the pacing, camera move, or body language you want.
- Audio (optional): One reference audio clip for voice or scoring, kept separate from picture references.
Lock identity before adding cinematic variation. Save the accepted references, prompt scaffold, influence values, version details, and failed tests beside each approved shot so the next scene remains reproducible.
Originally published by the PixMind Editorial Team
https://www.pixmind.io/posts/minimax-h3-character-consistency
For campaign teams, character consistency is a reference system rather than a lucky prompt. Define one master identity, separate wardrobe and environment inputs, keep the diagnostic prompt stable, and...
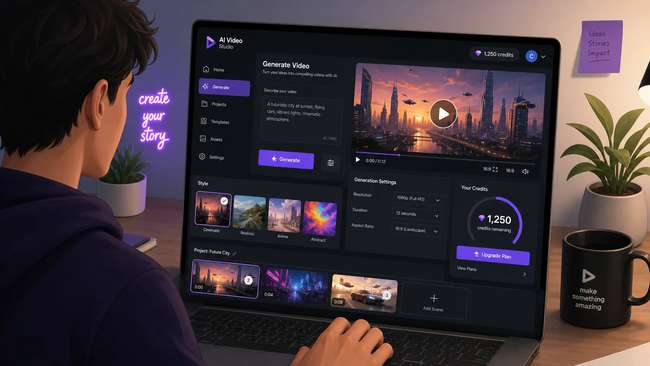
For visual creators, free credits are best used to answer one production question. Choose a representative shot, hold the prompt and references stable, record the access limits, and score usable seconds instead of burning the allowance on unrelated prompts.
Disclosure: I work with PixMind.
Key Takeaways
- MiniMax H3 is genuinely free to try, but every free path adds at least one of: watermark, queue, credit expiry, or volume caps.
- The official promotional credits are limited, commonly valid for only a few days, and typically render with a watermark and lower queue priority.
- Third-party aggregators often re-bundle MiniMax H3 access with free credit buckets earned through signups or tasks, sometimes without a watermark, but reliability and availability change frequently.
- PixMind offers MiniMax H3 through its AI video tool and the API platform, with starter credits for new accounts and no watermark on output. Check the current plan for the exact amount.
- For any real production volume, paid usage at $0.13/sec (2K) or $0.09/sec (768P) is cheaper than the time cost of chasing expiring free credits.
What "Free" Actually Means for MiniMax H3
Free access to a frontier video model is never quite free. The model still costs real compute to run, so whoever hosts the generation has to recover that cost somewhere. Understanding the four levers providers pull lets you read any "free MiniMax H3" offer in seconds instead of learning the catch mid-project.
Credits. Almost every free path issues credits rather than unlimited generations. Credits are denominated in seconds of output, generations, or points, and they run out. The official credits are commonly a few hundred units valid for only a few days. Aggregator platforms usually hand out credits in exchange for signups, daily logins, or task completion, and the buckets refill on the provider's schedule, not yours.
Watermarks. Free tiers commonly burn a logo or brand mark into the output. The watermark is the provider's advertising and the reason the tier can exist at zero cost. The mark is usually positioned to be hard to remove cleanly, and removing it from a finished clip is a terms-of-service gray area at best.
Queues. Free users typically sit behind paid users in the render queue. During peak hours a 5-second clip that should take a minute of compute can take ten or twenty minutes of waiting. For a one-off test this is fine. For a client deliverable on a deadline it is a project risk.
Expiry. Credits expire. The official promotional credits are widely reported as valid for only a few days from issue. Aggregator credits often have similar or shorter windows. If you claim a bucket of credits and come back next weekend, they may already be gone.
The honest summary: free MiniMax H3 is the right tool for a first test, a portfolio piece, or a hobby session. It is the wrong tool for any work where a missed deadline, a watermark on a client deliverable, or a mid-project credit expiry would cost more than the paid clip would have. The rest of this guide walks through each option, then gives a clear rule for when to switch.
MiniMax H3 in Action: Real Free-Credit Examples
Before the options, watch what a free-credit stack actually unlocks. The video below walks through a full free-access workflow for MiniMax H3, showing how to combine promotional credits and starter offers into enough render budget to test the model end to end.
https://www.youtube.com/embed/0K-UgMFjVQI" width="560" height="315" title="How to create free unlimited AI videos 2026 full guide" frameborder="0" allow="accelerometer; autoplay; clipboard-write; encrypted-media; gyroscope; picture-in-picture" allowfullscreen> A full guide shows how to stack free credits and starter offers into enough MiniMax H3 render budget for a complete test project.
Option 1: Official Promotional Credits
The most direct free path is the official product, where MiniMax issues promotional credits to new and sometimes returning users. This is the closest you can get to the canonical model, on the canonical infrastructure, without paying.
The mechanics are simple. You sign up on the official product, claim the welcome credit allocation, and generate. The model surface is the full MiniMax H3, so you get native 2K output, synchronized stereo audio, and the 12-reference multimodal input budget on the same checkpoint paid users run. Nothing about the model itself is downgraded.
The catch is that the credits are deliberately small and short-lived. Community reports consistently describe the welcome allocation as a few hundred credits valid for only a few days from issue. Free-tier renders also typically carry a watermark and sit in a lower-priority queue behind paid users. None of this is hidden, but it is easy to miss in the signup flow.
Use the official credits when you want to do any of the following:
- Confirm the model can actually produce the kind of shot you need before you pay anyone for it.
- Run a side-by-side comparison against another model on identical prompts.
- Produce a single portfolio or test clip where a watermark is acceptable.
Do not use the official credits when you need clean output, a firm deadline, or more than a handful of clips. The watermark rules it out for client work, and the short expiry window makes it unreliable for anything spread across multiple sessions. MiniMax H3 character consistency guide
Option 2: Third-Party Aggregator Platforms
A second free path runs through third-party aggregator platforms that re-bundle MiniMax H3 access alongside other video models. These services buy API capacity from MiniMax or a gateway and resell it under their own brand, often funding a free tier through ads, signups, or task completion.
A controlled trial reveals more than the word “free.” Compare watermarks, queues, resolution, control, retries, and repair time before choosing the route for paid production.
Originally published by the PixMind Editorial Team
For visual creators, free credits are best used to answer one production question. Choose a representative shot, hold the prompt and references stable, record the access limits, and score usable secon...
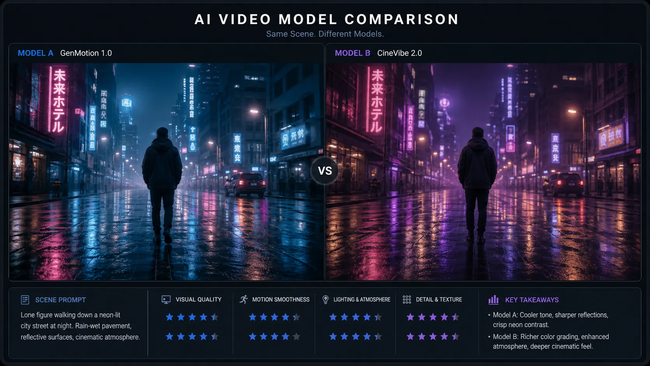
For visual creators, a model comparison should route real shots instead of declaring one universal winner. Start with the constraint that cannot fail—cinematic ceiling, native audio, character motion, reference control, turnaround, or cost per approved second.
Disclosure: I work with PixMind.
Key Takeaways
- Best value: MiniMax H3 at $0.13/sec (2K) delivers the highest quality per dollar, roughly one-third of Veo 3.1's published rate and about 23% below Kling 3.0.
- Best absolute quality: Veo 3.1 leads on 4K cinematic finish and synchronized audio, but caps clips near 8 seconds.
- Best for motion reuse: Kling 3.0's motion-transfer feature (1080p, $0.168/sec with audio) is unmatched for retargeting a known move onto new characters.
- Open-weight option: H3 is the only one of the three you can self-host, which matters for developers with privacy, latency, or cost-at-scale constraints.
- Audio is no longer a tiebreaker: all three ship native audio (H3 stereo, Kling and Veo synchronized), so the decision now hinges on resolution, length, price, and control.
Quick verdict by job
Lead with the job you need done, then pick the model. Each of these three wins a specific production scenario.
- Batch short-form content (TikTok, Reels, Shorts) on a budget: MiniMax H3. The 2K output is more than enough for vertical social, the 5 to 15-second range covers most hooks, and the per-second price keeps iteration cheap.
- Premium hero shots and brand film: Veo 3.1. When one shot has to look like a finished TV spot at 4K, Veo 3.1's cinematic quality and sync audio justify the premium.
- Reusing a real performance or camera move: Kling 3.0. Its motion-transfer feature takes a reference video's motion and applies it to a new subject, which neither H3 nor Veo does as directly.
- Self-hosted or privacy-sensitive pipelines: MiniMax H3. The open weights mean you can run it on your own infrastructure instead of sending prompts through a third-party API.
The three models at a glance
The table below collects the verified specifications for all three models, checked against MiniMax's official release notes, Kuaishou's Kling 3.0 documentation, and Google's Veo 3.1 product page as of August 2026.
Specification MiniMax H3 Kling 3.0 Veo 3.1
| Max resolution | 2K | 1080p | 4K
| Clip length | 5 to 15 seconds | 3 to 15 seconds | ~8 seconds
| Native audio | Yes, stereo | Yes, included in price | Yes, synchronized
| Reference inputs | Up to 12 | Motion-transfer reference | Standard text/image
| Standout capability | Multi-reference consistency, open weights | Motion transfer | Cinematic 4K finish
| Pricing model | $0.13/sec at 2K | $0.168/sec (audio included) | Premium per-second rate, higher than H3 and Kling
| Access | Open weight + hosted API | Hosted API | Hosted API (Google)
| Best for | High-volume, cost-sensitive production | Retargeting real motion | Hero shots and brand film
MiniMax H3 in Action: Real Comparison Examples
Before the deep dive, watch the models run head to head. The video below is a side-by-side MiniMax H3 versus Veo comparison that renders the same prompt through each model, so you can see where each one actually wins on screen.
https://www.youtube.com/embed/fU5uFVIzp_c" width="560" height="315" title="MiniMax H3 vs Veo 3 AI video comparison" frameborder="0" allow="accelerometer; autoplay; clipboard-write; encrypted-media; gyroscope; picture-in-picture" allowfullscreen> A side-by-side comparison renders the same prompt through MiniMax H3 and Veo to show where each model wins on detail, motion, and cinematic finish.
MiniMax's own positioning places H3 ahead of Veo and Kling on the price-to-quality curve, which is the claim the comparison video above puts to the test.
https://x.com/RyanLeeMiniMax/status/2082999154029306266">MiniMax H3 rankings vs Veo and Kling
MiniMax H3: open-weight 2K with twelve references
MiniMax H3 is the model that reshaped the value ladder in 2026. It is the only one of the three released as open weights, it pushes 2K resolution, and it accepts up to twelve reference inputs at once for identity, action, scene, and sound.
The reference system is H3's real differentiator for storytelling work. Instead of a single image anchor, you can hand it separate references for a character's face, a body or costume, a background, a camera move, and even a voice or ambient track. The model then binds those references across a 5 to 15-second clip, which is what makes it strong for serialized content where a character has to stay recognizable from shot to shot. Independent YouTube creator tests reviewed for this comparison consistently ranked H3 ahead of Kling 3.0 on visual detail, texture fidelity, and character motion coherence.
The trade-off is resolution ceiling. H3 tops out at 2K, so it is not the right tool for a 4K deliverable or a theatrical master. It is, however, enough for almost every vertical social format and most web playback. The native stereo audio is also notable: it is not a bolted-on text-to-speech track but a model-level audio output, which keeps sound design in the same generation pass.
H3 pricing worked example
At $0.13 per second at 2K, a finished minute of H3 footage runs about $7.80 before any failed generations. That number is the backbone of the value argument, because the same minute at Veo 3.1's premium per-second rate lands near three times that figure, which is the gap community benchmarks and AlphaSignal flagged in their July 2026 coverage.
Kling 3.0: motion transfer and 1080p output
Kling 3.0 from Kuaishou is the model to reach for when the motion itself is the asset. Its motion-transfer capability lets you supply a reference video and retarget the movement in that clip onto a new character or scene, which is something neither H3's reference system nor Veo 3.1's text-and-image pipeline does as directly.
Keep prompt, references, ratio, duration, and scoring rules stable across models. The production winner is the route that clears the shot's threshold with the least repair and operator time.
Originally published by the PixMind Editorial Team
For visual creators, a model comparison should route real shots instead of declaring one universal winner. Start with the constraint that cannot fail—cinematic ceiling, native audio, character motion,...
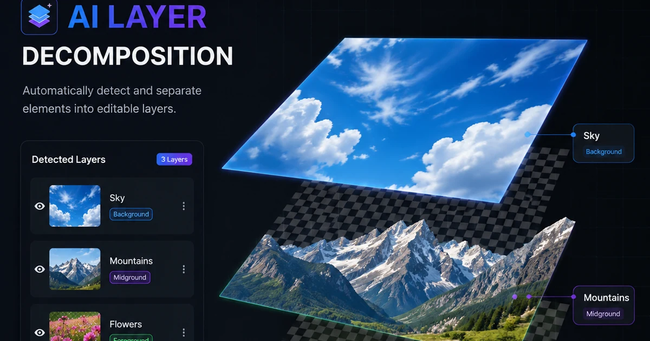
For designers, AI layer separation is useful when it supports a specific downstream edit. This board edition focuses on recovering movable transparent elements from a JPG or PNG while keeping one limitation explicit: separated text remains pixels, not live typography.
Disclosure: I work with PixMind.
Key takeaways
- Converting JPG/PNG to a layered PSD recovers pixel layers, positions, names, visibility states, and stacking order on the canvas. It does not recover the original fonts, vector paths, Smart Objects, or edit history.
- More layers are not always better. A practical rule is that every layer should correspond to a real downstream editing action.
- The current workflow supports JPEG and PNG files up to 30MB. Paid plans can download individual transparent PNGs, a ZIP containing all layers, and a layered PSD.
- Inspect each layer's outline and the recomposed image in the web workspace before renaming, grouping, and refining the layers in Photoshop. This keeps rework to a minimum.
Decide whether you need layer separation, background removal, or vectorisation
The goal is not simply to "process the image." It is to choose the right data structure for the next editing step. If you only want to remove the background, there is no reason to generate a dozen layers. If you need to enlarge a logo indefinitely or edit its paths, pixel-layer decomposition is not a substitute for vectorisation.
Next task Best tool Result Not designed to solve
| Keep only a person or product | Smart Background Remover | One transparent foreground image | Separating text, decorations, and multiple subjects
| Move the background, subject, text, and decorations independently | AI image layer separation | Multiple transparent pixel layers, a ZIP, or a PSD | Recovering fonts, pen paths, and the original project history
| Change only a local area in the image | AI Local Edit | A revised composite image | Building a maintainable multilayer structure
| Enlarge a logo, icon, or simple illustration and edit its nodes | Image to Vector | A scalable vector result | Separating layers in complex photography and natural textures
Start with one question: Which object will the next edit affect? If the answer is "only the background," two layers will usually be enough. If you need to edit the product, its shadow, price text, and decorative elements, retain each of those as a separate, controllable unit.
What AI image layer separation actually does
JPG and standard PNG files are flat raster images. When a final design is exported, its background, subject, shadows, text, and lighting effects are merged into a single pixel grid. Open that file in Photoshop and you will see only one layer. The software cannot tell whether a red area belongs to the product, headline, or decoration.
An image decomposition model tries to infer those components from visual semantics and occlusion, then outputs multiple RGBA images. RGB stores colour, while the alpha channel stores the transparency of each pixel. The public Qwen-Image-Layered paper describes this task as deriving multiple semantically disentangled RGBA layers from a single RGB image. This is a reference to a public technical framework. It does not mean that PixMind's current service uses that model or implements it in exactly the same way.
Each RGBA layer is still a pixel image, but it can be hidden, moved, resized, recoloured, or replaced independently. Adobe's overview of layers likewise explains layers as image components that can be handled separately without affecting other content. That is the core advantage of layer separation over a single-object cutout.
AI must infer areas hidden by other objects, so the output cannot be equivalent to recovering the creator's original assets. If a headline covers part of a person, or a prop obscures the back of a product, the model may generate part of the unseen content or may preserve only the visible outline needed for the current composite. Inspecting overlaps matters more than simply judging the final recomposed image.
Current input and output settings
The ranges below were verified as of this article's last update. Pricing and credit requirements can change, so refer to the live pricing page and the tool interface. This article does not state a fixed credit cost.
Setting Current range Recommendation
| Input formats | JPEG, PNG | Use an original that has not been repeatedly compressed whenever possible
| File size | Up to 30MB | If the file is too large, reduce its dimensions or compression quality first
| Aspect ratio | 1:16 to 16:1 | For extremely tall or wide images, confirm that every important element still has enough pixels
| Total pixel count | Between the equivalent of 512 × 512 and 6000 × 6000 pixels | Use Image Upscaler for a small image, but remember that upscaling cannot create accurate details that were never present
| Number of layers | Paid plans support 2 to 16 layers or Auto | Choose based on real editing actions; try Auto first for a complex composition
| First free trial | Up to 3 layers, without Auto | Suitable for generating and previewing a basic decomposition; downloading or exporting requires an upgrade
| Output resolution | 1K, 1.5K, 2K, Auto | Start at 1K for a social draft; choose a higher setting when you need more room for retouching and cropping
| Free-trial resolution | Fixed at 1K | Validate edges and layer logic before choosing later settings
| Output files | Individual transparent PNGs, a ZIP with all layers, and a layered PSD | Available to paid plans; choose according to the downstream software
How many layers should you choose?
Treat the PSD as an editable reconstruction. Name the layers, inspect transparency at high zoom, and test the actual product move, background replacement, or parallax task before handing the file downstream.
Originally published by the PixMind Editorial Team
https://www.pixmind.io/posts/ai-image-to-editable-psd-layers
For designers, AI layer separation is useful when it supports a specific downstream edit. This board edition focuses on recovering movable transparent elements from a JPG or PNG while keeping one limi...
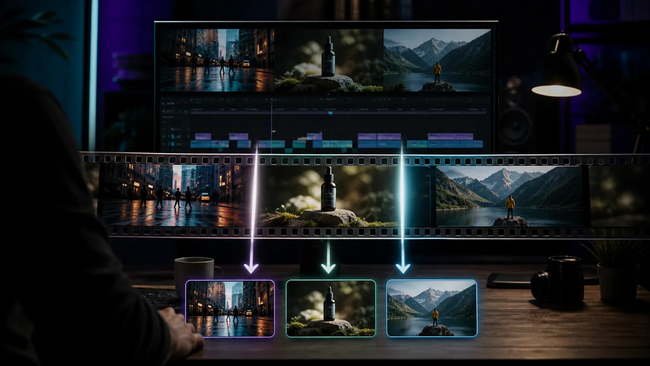
For visual creators, a flattened export can still contain a library of reusable shots. This board edition shows how to choose scene detection, fixed-duration cuts, or equal parts, then review boundaries before exporting individual MP4 clips.
Disclosure: I work with PixMind.
Key Takeaways
- Choose Scene changes when an edited video contains visible hard cuts between shots.
- Choose Fixed duration when each clip needs a repeatable length, or Equal parts when you need an exact file count.
- The current tool accepts MP4, MOV, and WebM files up to 100 MB and 120 seconds, processes them in the browser, and exports separate MP4 clips or one ZIP.
What does splitting a video by scene mean?
Scene-based video splitting finds substantial visual changes between consecutive frames and uses them as clip boundaries. A new camera angle, a hard edit, or a switch from a product close-up to a wide shot can create a boundary. Movement within one continuous shot should not.
This differs from cutting at arbitrary timestamps. A source with three visible shots can produce three independent clips. A continuous take with no clear edit may remain one clip.
Scene splitting is useful when the original editing project is unavailable. It will not rebuild the source timeline, effects, or layers, but it can recover practical shot-level files from an ad reference, montage, storyboard export, or approved social video.
Choose the split mode that matches the next task
The right mode depends on what must remain predictable: the visual boundary, the duration, or the number of files.
Mode How cuts are chosen Best for Output behavior
| Scene changes | Detects substantial visual transitions | Edited ads, reels, montages, and storyboard exports | One MP4 for each detected section
| Fixed duration | Cuts after a chosen number of seconds | Social segments, review batches, and delivery limits | Repeated lengths, with a shorter final clip when needed
| Equal parts | Divides total duration by a chosen clip count | Predictable handoffs and parallel review | Exactly 2 to 20 balanced clips
Use one decision rule: let content choose the boundary for edited footage, let time choose it for repeatable publishing slots, and let file count choose it for a fixed handoff. Scene detection is not automatically the best mode for every video.
How browser-based scene splitting works
The workflow has two distinct stages: finding boundaries and creating files.
The detector compares decoded video frames
The scene mode reads the primary video track from the selected file, decodes its frames, reduces them for analysis, and compares hue, saturation, and brightness features between neighboring frames. It uses an adaptive baseline, filters brief flashes, and groups candidates that are too close together.
That design explains both strengths and limits. Hard cuts create a strong difference and are easier to find. Slow dissolves, two similarly composed shots, exposure changes, or very fast motion can create weaker or misleading signals.
The implementation uses browser media interfaces exposed through Mediabunny. Its official Reading media files guide documents reading a user-selected File, checking whether a track can be decoded, and accessing frame-timed media data. The underlying W3C WebCodecs specification defines JavaScript interfaces for browser audio and video codecs.
Each result is rendered as a new MP4
After boundaries are ready, the splitter uses ffmpeg.wasm to create each segment. The ffmpeg.wasm overview describes the project as a WebAssembly and JavaScript port of FFmpeg that runs media processing inside browsers.
The current export path re-encodes video as H.264 and audio, when present, as AAC. The official FFmpeg Codecs Documentation documents the libx264 wrapper and native AAC encoder used by that command. This produces consistent MP4 files and avoids empty or repeated segments around seek points, but it is not a lossless stream copy. Rendering therefore takes longer than calculating timestamps alone, especially for higher-resolution or higher-frame-rate inputs.
How to split a video into scene clips
1. Add a compatible short video
Choose an MP4, MOV, or WebM file no larger than 100 MB and no longer than 120 seconds. The file must meet both limits.
Edited sources with deliberate cuts work best. Good candidates include product montages, short commercials, social reels, animatics, and reference clips you want to inspect shot by shot. If the browser cannot decode the source codec, export a standard MP4 and try again.
2. Select Scene changes
Choose Scene changes under “How should this video be split?” This tells the tool to inspect the visual content rather than apply a fixed schedule.
If the source is one continuous take, skip detection and choose Fixed duration or Equal parts instead.
3. Detect scenes and create the clips
Select Detect scenes and split. Progress covers both analysis and MP4 creation. The selected source stays on the device rather than being uploaded to product storage.
The first run may start more slowly while the browser prepares its media-processing components. Duration, resolution, frame rate, and output count all affect local processing time.
4. Preview every boundary
Each result shows a clip number, start time, end time, and duration. Check the clips immediately before and after every proposed cut:
- Does the previous shot end cleanly?
- Does the next clip begin on the intended image?
- Was a flash or exposure change mistaken for an edit?
- Did a dissolve remain inside one clip?
This review is still necessary because scene detection evaluates visual change, not story meaning or dialogue.
5. Download one MP4 or the complete ZIP
Download individual clips when only a few shots are useful. Choose Download all as ZIP when the complete batch will move into an editor, review queue, or asset library.
When each split mode works best
Scene changes for edited footage
Use visual transitions when the source already contains meaningful edits. Choose time or file count only when delivery constraints matter more than shot boundaries, and always review the clips on both sides of every detected cut.
Originally published by the PixMind Editorial Team
https://www.pixmind.io/posts/split-video-into-clips-by-scene
For visual creators, a flattened export can still contain a library of reusable shots. This board edition shows how to choose scene detection, fixed-duration cuts, or equal parts, then review boundari...
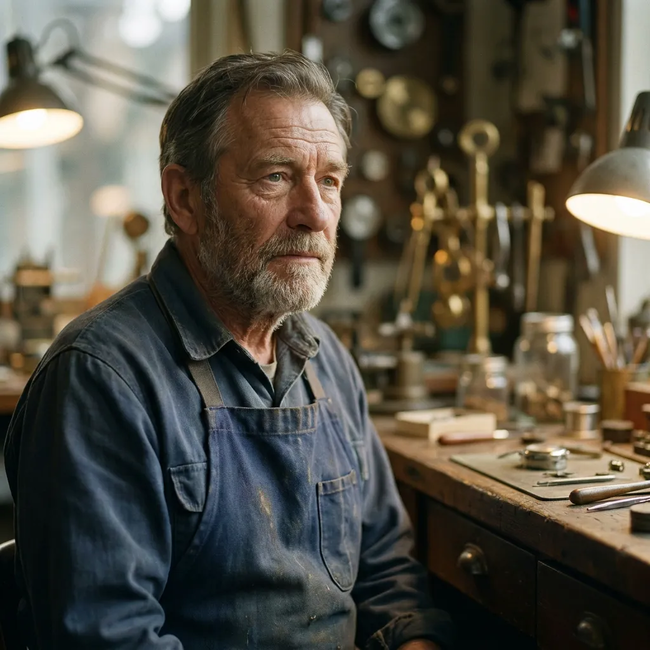
For visual creators, the useful comparison is not a universal winner. It is which model produces more approved seconds with less repair for a specific shot.
Disclosure: I work with PixMind.
Name the constraint that cannot failLong continuous duration, a large reference package, precise performance, native audio, local editing, budget, and turnaround should drive the choice.
Run a matched testHold the creative brief, subject reference, ratio, duration, resolution, and scoring rubric stable. Translate the brief into each model's preferred controls instead of forcing identical syntax.
Build a routing ruleSeedance is a strong first test for longer reference-heavy scenes; Kling belongs in the first round for tightly controlled performance beats. A mixed edit can use both.
Compare routes in PixMind's AI video workspace. Seedance context: BytePlus resource guide.
Originally published by the PixMind Editorial Team
For visual creators, the useful comparison is not a universal winner. It is which model produces more approved seconds with less repair for a specific shot.
Disclosure: I work with PixMind.
Name the con...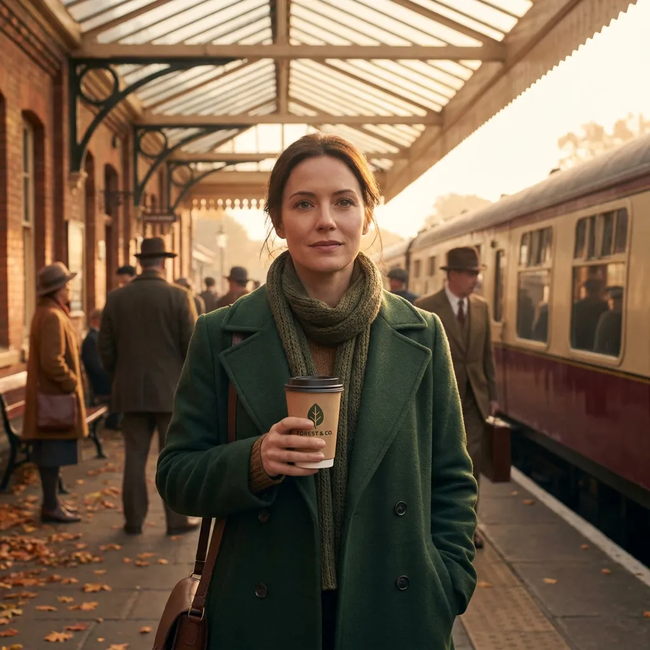
For builders, a video generation call is a job system: submit once, persist the task, poll with backoff, and copy the result to durable storage.
Disclosure: I work with PixMind.
Persist and deduplicateStore your request ID, provider task ID, owner, normalized parameters, status, attempts, and timestamps. Use an idempotency key so client retries cannot create duplicate paid jobs.
Poll with disciplineUse bounded exponential backoff with jitter, respect rate limits, and stop on a documented terminal state. Expose stalled jobs instead of losing them in logs.
Validate media and assetsCheck reference files before submission, keep them available for the task lifetime, and save the exact request with secrets removed. Move completed results into storage you control.
See the PixMind API platform, BytePlus guidance, and Volcengine docs.
Originally published by the PixMind Editorial Team
For builders, a video generation call is a job system: submit once, persist the task, poll with backoff, and copy the result to durable storage.
Disclosure: I work with PixMind.
Persist and deduplicateS...
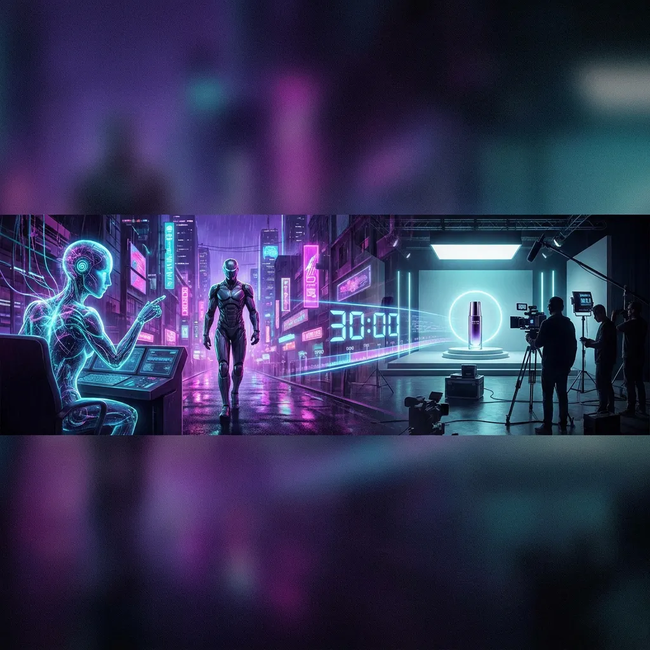
For visual creators, longer AI video matters only when subject, geography, camera, light, and sound remain one coherent scene.
Disclosure: I work with PixMind.
Write a four-beat mapPlan setup, development, turn, and resolution around one objective. Protect screen direction and connect camera movement to subject blocking.
Organize referencesAssign inputs to identity, product geometry, environment, motion, camera, or audio. Remove near-duplicates and contradictions before generation.
Edit locally, review globallyUse region edits for bounded changes such as signage or product color, then recheck continuity across the entire clip.
Test the plan in the Seedance 2.5 workflow. First-party context: BytePlus Seedance resource.
Originally published by the PixMind Editorial Team
For visual creators, longer AI video matters only when subject, geography, camera, light, and sound remain one coherent scene.
Disclosure: I work with PixMind.
Write a four-beat mapPlan setup, developme...
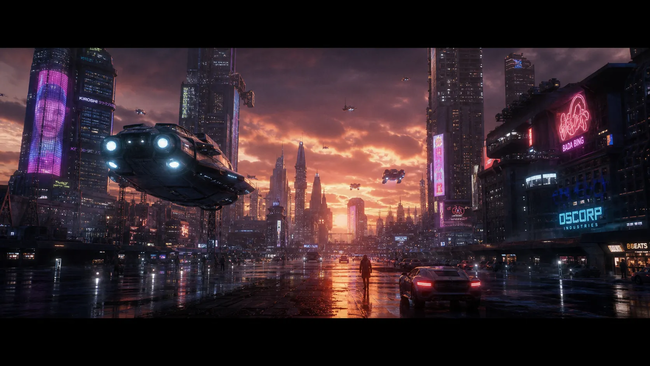
For visual creators, short-form success begins before rendering: one readable subject, one pattern interrupt, and one complete beat.
Disclosure: I work with PixMind.
Design the first secondBegin mid-action, reveal an unexpected product movement, or add one surprising detail to a familiar scene. Keep the subject instantly legible.
Lock the minimum referencesUse identity, motion, style, and audio references only when each has a distinct role. Conflicting inputs make iteration harder.
Render, diagnose, adaptCheck whether the hook reads without captions, the action completes, and sound reinforces the beat. Once the master works, reframe and retime it for each placement.
Try the MiniMax H3 generator and track hold rate, completion rate, saves, and repair time.
Originally published by the PixMind Editorial Team
For visual creators, short-form success begins before rendering: one readable subject, one pattern interrupt, and one complete beat.
Disclosure: I work with PixMind.
Design the first secondBegin mid-act...
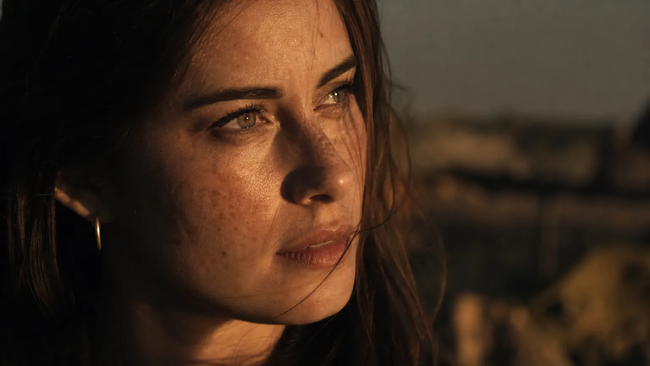
For visual creators, H3 becomes useful when its native 2K output and multimodal references are organized into a repeatable shot process.
Disclosure: I work with PixMind.
Give every reference one jobUse an identity frame for the person or product, a motion clip for timing, a style frame for palette and production design, and audio only when voice or sonic texture must remain stable. Remove redundant or contradictory inputs.
Render a diagnostic pass firstWrite the prompt in four layers: subject, action, camera, and atmosphere. Generate a short draft and judge motion, continuity, and action completion before texture. A sharp 2K frame cannot rescue a broken action.
Use 2K where editors benefitNative 2K creates room for cropping, stabilization, reframing, and compositing. Test the model with a fixed set of character, product, camera, and audio-led shots, then track approved seconds and repair time.
Try the MiniMax H3 generator on PixMind. Model context: MiniMax H3 announcement.
Originally published by the PixMind Editorial Team
For visual creators, H3 becomes useful when its native 2K output and multimodal references are organized into a repeatable shot process.
Disclosure: I work with PixMind.
Give every reference one jobUse ...

For visual creators, the best workflow is the one that preserves intent while making each decision easy to inspect and revise. This edition emphasizes those practical controls. Runway prompts become easier to control when visible content, subject motion, camera motion, and scene motion are written as separate decisions.
Disclosure: I work with PixMind.
This guide turns Runway's current official prompting principles into a practical workflow: describe visible action, separate subject motion from camera motion, use positive phrasing, and iterate one control at a time.
Why Prompt Quality Makes or Breaks Runway Output
Runway's current guidance favors direct, visual language. For text-to-video, describe both what appears in the frame and how it moves. For image-to-video, let the input image establish appearance and composition while the text prompt concentrates on motion.
The runway-video-prompt-generator on PixMind is designed to bridge that gap — it turns your rough ideas into structured, model-ready prompts without requiring you to memorize syntax.
Understanding why the generator makes the choices it does will help you override defaults confidently and push results further.
Section I: Runway Prompt Parameter Cheatsheet
Before diving into scenarios, here is the core parameter vocabulary Runway responds to. Think of this as your reference card.
Core Parameter Table
Parameter What It Controls Example Values
| Subject | The main actor or object in the frame | "a woman in a red trench coat", "a rusted cargo ship"
| Action | What the subject is doing | "walks slowly through fog", "rotates 360°"
| Camera Motion | How the virtual camera moves | slow push-in, orbit left, static, handheld shake
| Lens / Focal Length | Depth of field and compression | 24mm wide, 85mm portrait, macro
| Lighting | Mood and source of light | golden hour backlight, neon fill, overcast diffuse
| Color Grade | Tonal palette | desaturated teal-orange, warm analog film, high-contrast monochrome
| Atmosphere | Environmental texture | heavy fog, light rain, dust particles, heat shimmer
| Duration Hint | Pacing signal | slow motion, real-time, time-lapse
| Style Reference | Visual shorthand | cinematic, documentary, lo-fi VHS, studio product
The Core Prompt Philosophy
Runway's official Gen-4 and Gen-4.5 guidance recommends starting simple and adding detail only when it improves control.
- Text to video: describe the visible scene plus subject, environment, and camera motion.
- Image to video: avoid redescribing the entire input image; focus on the motion you want.
- Use positive phrasing: write “locked camera” instead of “no camera movement.”
- Iterate one variable at a time: add camera motion, scene motion, or style in separate tests so you can see what changed.
A useful text-to-video starting structure is:
[Visible subject and environment]. [Subject action].
[Camera motion]. [Scene motion]. [Optional visual or motion style].
Section II: Scenario — Cinematic Portrait Walk
The Goal
A character walking through an urban environment with a film-like quality. This is one of the most requested use cases for creators building short films or social reels.
Example Output Note
⚠️ The following prompt template is illustrative, based on announced Runway model behavior and community-reported results. It is not a direct model test output from PixMind's servers.
Recommended Prompt Template
A young woman in a long olive coat walks slowly through a rain-slicked Tokyo alley at night,
slow push-in camera, 50mm lens, neon reflections on wet pavement,
shallow depth of field, warm amber and cyan color grade, cinematic 2.39:1 aspect ratio
Hands-On Case
Start with the template above in the runway-video-prompt-generator. In the "Subject" field, swap "young woman in a long olive coat" with your character description. Change "Tokyo alley" to your location. Keep the camera and lighting block intact — those are the lines doing the heaviest cinematic lifting.
⚠️ Pitfall Warning
Do not stack two camera motions. Writing "slow push-in and pan right" confuses the model. Pick one motion per prompt. If you need a compound move, generate two clips and cut between them in post.
Section III: Scenario — Product Hero Shot (Ecommerce)
The Goal
A floating product — perfume bottle, sneaker, gadget — rotates elegantly against a clean background. Essential for ecommerce brands.
Example Output Note
⚠️ Prompt template below is an illustrative example based on typical Runway product-video behavior, not a verified PixMind model output.
Recommended Prompt Template
A luxury glass perfume bottle slowly rotates 360° on a white marble surface,
orbit camera motion, studio three-point lighting, soft shadows,
macro lens, clean white background, photorealistic product commercial style
Hands-On Case
Paste this into the generator, then use the "Atmosphere" override field to add light mist if you want a premium fragrance feel. For tech products, swap soft shadows with dramatic side lighting, specular highlights. The generator will auto-complete the style tag — accept it unless you have a specific reference.
For deeper ecommerce prompt work, the AI product background generator on PixMind pairs well here: generate a still first, then bring it into Runway for motion.
⚠️ Pitfall Warning
Avoid describing the product's internal mechanism. Runway will attempt to visualize it literally and produce glitchy geometry. Describe only what a camera would see from the outside.
Section IV: Scenario — Nature & Landscape Time-Lapse
The Goal
Clouds rolling over a mountain range, tide coming in, flowers blooming — atmospheric time-lapse content for documentaries, backgrounds, or ambient loops.
Example Output Note
⚠️ Illustrative prompt template; not a direct model output from PixMind.
Recommended Prompt Template
Dramatic storm clouds rolling over snow-capped Dolomite peaks,
static wide shot, 24mm lens, golden hour side light fading to blue dusk,
time-lapse motion, cool desaturated palette, epic documentary style
Hands-On Case
In the runway-video-prompt-generator, set the Duration Hint to time-lapse. This single tag shifts the model's motion prediction toward compressed-time movement. Then lock the camera to static — a moving camera on a time-lapse usually produces unstable, nauseating results.
Swap "Dolomite peaks" for any biome: Sahara dunes, Amazon canopy, Arctic tundra. The lighting block stays the same.
⚠️ Pitfall Warning
Do not add characters to landscape time-lapses. A human figure in a time-lapse prompt forces the model to choose between realistic human motion and compressed time — it cannot do both, and the figure will morph unnaturally.
Section V: Scenario — Abstract / Motion Graphics Loop
The Goal
Looping abstract visuals for music videos, stage backdrops, or social media content. No subject, pure visual texture.
Example Output Note
⚠️ Illustrative prompt template; not a direct model output from PixMind.
Recommended Prompt Template
Fluid iridescent liquid morphing into geometric crystalline shapes,
slow zoom-out, macro lens, studio backlight, deep black background,
rich jewel tones — sapphire, emerald, gold — seamless loop, abstract art style
Hands-On Case
The phrase seamless loop is a strong signal to Runway to match the first and last frames. It does not guarantee a perfect loop, but it significantly improves the chance. After generation, use the video-to-prompt tool on PixMind to reverse-engineer the visual language of a successful take, then iterate from that extracted prompt.
⚠️ Pitfall Warning
Avoid color names that are also object names. Writing coral can produce literal coral reef imagery. Write warm salmon-pink instead to stay purely in color territory.
Section VI: Scenario — Dialogue / Talking Head
The Goal
A character speaks directly to camera — for explainer videos, social content, or narrative scenes. This is technically demanding for any AI video model.
Example Output Note
⚠️ Illustrative prompt template; not a direct model output from PixMind.
Recommended Prompt Template
A middle-aged male scientist in a white lab coat speaks calmly to camera,
static shot, 85mm portrait lens, soft key light from screen-left,
neutral grey background, shallow depth of field, documentary interview style,
subtle natural head movement, no exaggerated gestures
Hands-On Case
The phrase no exaggerated gestures acts as a negative constraint and tends to reduce the wild arm-waving Runway sometimes introduces. Pair this with subtle natural head movement to prevent the uncanny frozen-face look.
For character consistency across multiple clips, check out the AI video character consistency guide — it covers how to carry a character's appearance from shot to shot.
⚠️ Pitfall Warning
Do not describe lip sync in the prompt. Runway's video model does not perform phoneme-accurate lip sync from text prompts. Describing speech will produce a character whose mouth moves randomly. Use a dedicated lip-sync layer in post-production.
Section VII: Scenario — Action & Sports
The Goal
High-energy sequences: a skater landing a trick, a sprinter crossing a finish line, a surfer dropping into a wave.
Example Output Note
⚠️ Illustrative prompt template; not a direct model output from PixMind.
Recommended Prompt Template
A professional skateboarder lands a kickflip on a sun-drenched LA street,
low-angle tracking shot, 35mm lens, harsh midday sun, long shadows,
slow-motion at 120fps aesthetic, high contrast warm grade, sports commercial style
Hands-On Case
Low-angle tracking shot is the single most effective camera cue for making action feel powerful. Combine it with slow-motion to give the model time to render motion blur correctly. In the runway-video-prompt-generator, use the "Energy" slider if available — set it to high for action sequences.
For inspiration on what other video generators do with action content, the best AI video generators 2026 roundup shows how Runway compares to Veo 3, Kling, and Seedance 2.5.
⚠️ Pitfall Warning
Avoid describing multiple athletes simultaneously. The model struggles to track more than one fast-moving human body. Feature one subject per clip; composite in post if you need a crowd.
Section VIII: Scenario — Architectural & Interior Walk-Through
The Goal
A smooth camera glide through a space — a modernist house, a cathedral, a sci-fi corridor. Used heavily in real estate, game trailers, and architectural visualization.
Example Output Note
⚠️ Illustrative prompt template; not a direct model output from PixMind.
Recommended Prompt Template
Camera glides slowly through a minimalist Japanese living room at dawn,
smooth dolly forward, 24mm wide lens, soft natural window light from the right,
warm wood tones, white walls, sparse furniture, architectural photography style,
no people, photorealistic
Hands-On Case
No people is essential here — even a hint of human presence in the prompt can cause Runway to insert a blurry figure in the background. The phrase photorealistic combined with architectural photography style pushes the model toward sharp geometry rather than painterly softness.
To generate a matching still image for the same space first, try the AI image generator on PixMind, then use the still as a reference frame in Runway's image-to-video mode.
⚠️ Pitfall Warning
Do not describe furniture in excessive detail. Listing every piece of furniture ("a teak coffee table, two linen sofas, a ceramic vase, a floor lamp…") overloads the spatial budget of the prompt. Describe the dominant material palette and let the model fill in the specifics.
Section IX: General Prompt Framework & Pitfall Checklist
The Universal Runway Prompt Framework
Use this as your fill-in-the-blank scaffold every time:
[SUBJECT] + [ACTION/STATE],
[CAMERA MOTION], [LENS],
[LIGHTING SOURCE and QUALITY],
[ATMOSPHERE/ENVIRONMENT],
[COLOR GRADE],
[STYLE REFERENCE],
[NEGATIVE CONSTRAINTS if needed]
Example filled in:
A lone lighthouse keeper climbs spiral stairs with a lantern,
slow upward tilt, 35mm lens,
warm lantern glow against cold stone walls,
heavy fog outside the windows,
muted teal and amber grade,
cinematic period drama style,
no modern objects
Pitfall Checklist
Run through this before every generation:
# Check Why It Matters
| 1 | ✅ Visible subject and environment | Gives text-to-video a concrete scene
| 2 | ✅ Subject motion is explicit | Defines what the subject does
| 3 | ✅ Camera motion is explicit | Separates camera behavior from subject action
| 4 | ✅ Scene motion is included when relevant | Covers wind, dust, water, crowds, and other environmental movement
| 5 | ✅ Positive phrasing | “Locked camera” is clearer than “no camera movement”
| 6 | ✅ Input image is not redundantly redescribed | Keeps image-to-video focused on motion
| 7 | ✅ One new control per iteration | Makes successful and failed changes traceable
| 8 | ✅ Every instruction is visually observable | Avoids abstract intent the camera cannot show
When to Use the runway-video-prompt-generator vs. Manual Prompting
- Use the generator when starting from scratch, exploring a new visual style, or when your first manual attempt produced unexpected results.
- Write manually when you have a precise technical shot in mind and know the exact camera vocabulary.
- Combine both — let the generator draft, then hand-edit the camera and lighting block for precision.
You can also use the video-to-prompt tool to analyze a reference video you admire, extract its visual language, and feed that extracted language back into the runway-video-prompt-generator for a style-matched starting point.
Choose the Prompt Structure by Runway Workflow
Workflow Let the Input Provide Put in the Text Prompt
| Text to video | Nothing | Subject, environment, visual style, subject motion, scene motion, camera motion
| Image to video | Subject appearance, composition, lighting, color | Subject motion, scene motion, camera motion, timing
| Reference-video iteration | Extracted shot language | Keep the successful motion terms; change one creative variable at a time
If you are starting from a reference clip, use Video to Prompt to extract its shot structure, then rewrite the result with the Runway pattern above.
Wrapping Up
The runway-video-prompt-generator removes the blank-page problem — but the prompts it generates are a starting point, not a final answer. The real skill is knowing which parameters to override and why.
Use the scenario templates in this guide as your library. Bookmark the pitfall checklist. And when a generation surprises you (positively or negatively), use the video-to-prompt tool to decode what actually happened in the visual language — then build from there.
Every strong Runway video starts with a prompt that knows exactly what it wants.
Official references
- Runway: Text to Video Prompting Guide
- Runway: Gen-4 Video Prompting Guide
- Runway: Camera Terms, Prompts, and Examples
Save the strongest result together with its prompt structure and reference choices. That small archive becomes far more useful than a gallery with no record of how the work was made.
Originally published by the PixMind Editorial Team https://www.pixmind.io/posts/runway-video-prompt-generator-guide
For visual creators, the best workflow is the one that preserves intent while making each decision easy to inspect and revise. This edition emphasizes those practical controls. Runway prompts become e...
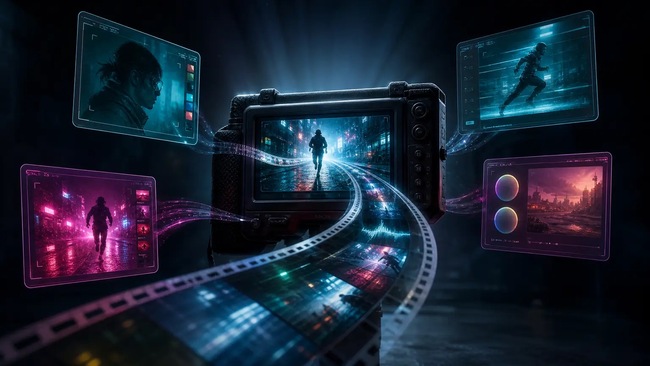
For visual creators, the best workflow is the one that preserves intent while making each decision easy to inspect and revise. This edition emphasizes those practical controls. A reference video is a sequence of production choices, not one giant prompt; preserving those choices shot by shot is what makes the result reusable.
Disclosure: I work with PixMind.
A reference video is rarely one prompt. It is a sequence of shots, and each shot has its own subject, action, camera movement, lighting, sound, and transition. This guide shows how to turn that sequence into structured, reusable AI video prompts without flattening the whole clip into a vague summary.
You will learn a practical video prompt reverse-engineering workflow, a timestamped output schema, six scene breakdowns, and a checklist for converting the result into Veo, Runway, Seedance, or another target model.
Want the first draft automatically? Upload a clip to PixMind Video to Prompt, then use this guide to inspect and refine the shot list.
Part 1: Core Concepts & Parameter Cheat Sheet
What Is Video Prompt Reverse-Engineering?
Video prompt reverse-engineering means analyzing a clip shot by shot and converting its visible and audible choices into structured production language. Instead of guessing the original creator's prompt, you document what is actually present: subject, action, environment, framing, camera motion, lighting, color, sound, and transitions.
The result is not a forensic copy of the source. It is an editable creative specification you can reuse with a different subject, product, location, or target video model.
The Five-Layer Prompt Structure
Every strong video prompt is built from five stacked layers:
Layer What It Captures Example Descriptors
| Subject | Who or what is in the frame | "a woman in a white linen dress"
| Action / Motion | What's moving and how | "walking slowly through tall grass"
| Environment | Location, time of day, weather | "golden-hour meadow, soft wind"
| Camera | Shot size, movement, lens character | "wide tracking shot, slight lens flare"
| Style / Mood | Aesthetic direction, color grade, tone | "cinematic, warm tones, film grain"
Core Parameter Cheat Sheet
Parameter Starter Default Advanced Options
| Shot size | Medium shot | Extreme close-up / aerial
| Motion speed | Normal speed | Slow motion / time-lapse
| Lighting | Natural daylight | Golden hour / neon backlight
| Color grade | Neutral | Teal-orange / desaturated
| Camera movement | Static | Dolly / handheld shake
| Duration hint | 5–8 seconds | 15–30 seconds
| Audio hint | None | Ambient sound / dialogue
| Aspect ratio | 16:9 | 9:16 (vertical) / 1:1
Core principle: Start with the details that materially change the shot, then add one control at a time. A short, internally consistent prompt is more useful than a long prompt containing competing camera, lighting, or action instructions.
A Shot-by-Shot Video Prompt Output Schema
For multi-shot clips, create one record per shot instead of one paragraph for the whole video:
Field What to Record Example
| Timecode | Start and end of the shot | 00:04–00:07
| Subject | Visible person, object, or product | Runner in a red windbreaker
| Action | Subject and environmental motion | Runner turns; rain blows left to right
| Camera | Shot size, angle, and movement | Low-angle medium shot, handheld tracking
| Lighting and color | Source, direction, contrast, palette | Cool overcast key, muted blue shadows
| Audio | Dialogue, ambience, effects, music | Footsteps, rain, low bass pulse
| Transition | How the next shot begins | Whip-pan cut on movement
This schema directly addresses scene-by-scene extraction queries such as “AI prompt from clip to each scene.” It also makes errors easy to spot: if a tool labels a locked shot as a dolly, you can correct one field without rewriting the entire prompt.
Part 2: Scene Walkthrough — Cinematic Nature Landscape
Goal
You find a travel documentary clip: a mist-covered mountain range at dawn, a slow aerial pull-back, no people. You want to recreate that atmosphere.
✅ Reference Visual Example
(Illustrative example — not an actual PixMind model output.)
Recommended Prompt Template
Aerial drone shot slowly pulling back from a mist-covered mountain ridge at dawn.
Pale blue and soft orange light filters through low clouds. Pine trees visible below.
No people. Cinematic color grade, anamorphic lens flare, 4K quality.
Mood: serene, vast, slightly melancholic.
Duration: ~8 seconds.
Step-by-Step
- Mute the audio and watch the clip three times. Focus only on what the camera is doing — ignore the subject content for now.
- Identify the dominant direction of movement. In this case: upward + backward (pull-back).
- Name the light source and its quality. Dawn = low angle, diffused, warm-to-cool gradient.
- Compress the style into 2–3 adjectives. "Cinematic, serene, vast."
- Paste your notes into PixMind's Video-to-Prompt tool to auto-extract a draft, then refine it manually.
⚠️ Common Mistake
Don't write the entire scene description as one continuous run-on sentence. Models like Veo 3 perform noticeably better when subject, motion, and style are separated with line breaks or commas — burying everything in a single paragraph degrades output quality.
Part 3: Scene Walkthrough — Product Advertisement
Goal
A 10-second beauty ad: a product on a marble surface, slow push-in, soft studio lighting, pastel background. You want to distill a reusable product video template.
✅ Reference Visual Example
(Illustrative example — not an actual PixMind model output.)
Recommended Prompt Template
Close-up slow zoom-in on a [product name] bottle placed on white marble surface.
Soft diffused studio lighting from upper-left. Pastel pink background, out of focus.
Subtle water droplets on the product. No hands, no people.
Elegant, minimal, luxury aesthetic. Smooth camera movement, no shake.
5-second clip, 16:9.
Step-by-Step
- Pause on three key frames in the reference ad: the opening, the midpoint, and the end.
- Observe what changes between frames. Here, only the camera distance changes (push-in) — the background and lighting remain constant throughout.
- Identify brand-specific elements and swap them out. Replace the product name and color palette with your own.
- Test with PixMind's Seedance 2 AI video generator — its product ad scene handling is specifically optimized for this kind of controlled studio aesthetic.
⚠️ Common Mistake
Avoid vague luxury descriptors like "high-end" or "premium." Instead, describe the visual evidence of luxury: marble, soft shadows, minimal composition, slow movement. Models respond to concrete visual signals, not abstract quality labels.
Part 4: Scene Walkthrough — Urban Street Scene with People
Goal
A street photography-style video: a busy intersection at night, handheld camera, neon lights reflecting off wet pavement, pedestrians moving quickly through the frame.
✅ Reference Visual Example
(Illustrative example — not an actual PixMind model output.)
Recommended Prompt Template
Handheld medium shot of a busy city intersection at night, wet pavement reflecting
neon signs in red, blue, and yellow. Crowds of people walking quickly in multiple
directions. Slight motion blur on pedestrians. Shallow depth of field.
Urban, gritty, high-contrast. Tokyo or New York aesthetic.
Camera: slight sway, no stabilization. 6–8 seconds.
Step-by-Step
- List every light source in the scene. Neon signs, headlights, shop windows — each one is a descriptor.
- Describe crowd density. "Sparse," "moderate," or "dense" gives the model a population signal.
- Capture the camera's personality. Handheld means intentional imperfection — explicitly write "no stabilization" or "slight camera sway."
- Use PixMind's Text-to-Prompt tool to generate a base draft from your scene notes, then layer in camera descriptors manually.
⚠️ Common Mistake
Naming a specific real-world location (e.g., "Shibuya Crossing") helps establish an aesthetic reference, but it can't replace visual description. Models may ignore the place name and render a generic street. Always describe what you see, not just where it is.
Part 5: Scene Walkthrough — Emotional Close-Up Portrait
Goal
A documentary-style close-up: an elderly person's face, natural window light, slow push-in, no dialogue, contemplative atmosphere.
✅ Reference Visual Example
(Illustrative example — not an actual PixMind model output.)
Recommended Prompt Template
Slow push-in close-up of an elderly person's face, mid-60s, neutral expression,
thoughtful and calm. Natural soft light from a window on the left side.
Slight skin texture visible. Background: blurred warm interior.
Documentary style, desaturated color grade, no music cue.
Camera: very slow dolly-in, ultra-stable. 8 seconds.
Step-by-Step
- Identify the emotional anchor. What single word captures the mood? Here it's "contemplative." Write it explicitly.
- Describe the direction and quality of light. "Window light from the left" gives the model far more to work with than "natural light."
- Note what is deliberately absent. No smile, no action, no dialogue — negative descriptors are just as effective as positive ones.
- Test on Veo — based on announced specs, Veo 3/3.1 handles realistic human close-ups with strong lighting fidelity particularly well.
⚠️ Common Mistake
Never specify a real person's face or likeness in a prompt. Describe demographic and emotional characteristics instead. This keeps your prompt within model usage guidelines and produces more consistent results across multiple generations.
Part 6: Scene Walkthrough — Action / Sports Footage
Goal
A surfing video: aerial perspective, athlete riding a massive wave, slow motion, spray sparkling in sunlight, high energy.
✅ Reference Visual Example
(Illustrative example — not an actual PixMind model output.)
Recommended Prompt Template
Aerial shot looking down at a surfer riding a large breaking wave, slow motion.
White water spray exploding upward, backlit by bright midday sun — sparkle effect.
Ocean: deep blue-green. Surfer: small relative to the wave.
High energy, dynamic composition. Camera: hovering drone angle, slight tilt.
Slow motion at 50% speed. 6 seconds, 16:9.
Step-by-Step
- Establish scale relationships. "Surfer appears small relative to the wave" gives the model a compositional anchor point.
- Describe how the light interacts with the scene. Backlit spray creates a sparkle/halo effect — call it out explicitly.
- Specify slow motion with a number. "50% speed" or "120fps playback" is clearer than just writing "slow motion."
- Check the Seedance 2 prompt page for motion-specific prompt structures optimized for high-action scenes.
⚠️ Common Mistake
High-action scenes are where models produce the most artifacts — distorted limbs, incorrect water physics. Adding constraints like "physically realistic water motion" or "no distortion" measurably reduces the likelihood of these issues.
Part 7: Scene Walkthrough — Brand Story / Narrative Short
Goal
A 15-second brand film: a craftsperson's hands shaping clay on a pottery wheel, warm workshop lighting, close-up detail, slow cuts between shots.
✅ Reference Visual Example
(Illustrative example — not an actual PixMind model output.)
Recommended Prompt Template
Close-up of weathered hands shaping wet clay on a pottery wheel, slow deliberate
movement. Warm tungsten workshop light, dust particles visible in the air.
Background: blurred wooden shelves with ceramic pieces.
Tactile, artisanal, warm color grade. Camera: slow macro push-in on hands.
Ambient sound: soft spinning wheel, no music. 10–12 seconds.
Step-by-Step
- Lead with texture descriptors. "Weathered hands," "wet clay," "wooden shelves" — tactile language activates richer visual rendering.
- Add ambient particle details. "Dust particles visible in the air" adds significant depth and realism without increasing compositional complexity.
- Include an audio hint if the model supports it. Both Veo 3 and Seedance 2.5 support native audio generation — "ambient sound: soft spinning wheel" is a valid and effective prompt element.
- Reference the Seedance 2 product ad use cases for brand narrative prompt structures validated against commercial output.
⚠️ Common Mistake
Multi-shot narrative prompts (Shot A → Shot B → Shot C) tend to confuse single-clip models. If you need cuts between shots, generate each clip separately and assemble them in post — don't try to describe an editing sequence inside a single prompt.
Part 8: Universal Prompt Framework & Pre-Submit Checklist
Universal Video Prompt Framework
A structure that works across every scene type:
[Shot size] + [Subject] + [Action/Motion],
[Environment] + [Lighting],
[Camera movement] + [Camera character],
[Style/Color grade] + [Mood],
[Duration] + [Aspect ratio].
Optional: [Audio hint].
Filled-in example:
Wide tracking shot of a woman in a red coat walking through a snowy forest,
late afternoon light filtering through bare trees, soft blue shadows on snow.
Camera: slow lateral track, smooth and stable.
Cinematic, desaturated cool tones, quiet and melancholic.
8 seconds, 16:9. No dialogue.
Prompt Length Reference
Prompt Length Best For Risk
| Under 30 words | Quick tests, style exploration | Too vague, inconsistent output
| 40–80 words | Most production use cases | Sweet spot
| 80–120 words | Complex multi-element scenes | Possible element conflicts
| 120+ words | Rarely appropriate | High contradiction risk
Pre-Submit Checklist
Run through this before submitting any video prompt:
- [ ] No conflicting motion instructions — e.g., "handheld" and "perfectly stable" cannot coexist in the same prompt.
- [ ] Light source is named — "natural light" is weaker than "golden-hour sidelight from the right."
- [ ] Camera movement is specified — static, dolly, pan, tilt, handheld, aerial: pick one and state it clearly.
- [ ] Subject scale relationships are defined — especially important in landscapes, action scenes, and crowd shots.
- [ ] Style adjectives are visual, not abstract — "warm tones, film grain" beats "cinematic masterpiece."
- [ ] Duration is included — models use duration to calibrate motion pacing and transitions.
- [ ] No real person's likeness is referenced — describe physical and emotional characteristics, not a specific identity.
- [ ] Audio hint added for models that support it — don't leave the audio field blank in Veo 3 or Seedance 2.5 prompts.
Quick Reference: Recommended PixMind Tools by Step
Step Task Recommended Tool
| 1 | Upload footage, get a prompt draft | Video-to-Prompt
| 2 | Refine scene notes into a polished prompt | Text-to-Prompt
| 3 | Generate video from your final prompt | Veo or Seedance 2
| 4 | Go deeper on prompt strategy | YouTube Video-to-Prompt Guide
Part 9: Putting It All Together
Text-to-prompt is fundamentally a translation skill — converting visual information into the specific vocabulary that AI models are trained to understand. The more precisely you describe what you see (rather than what you feel), the more consistently the model can reproduce it.
Start with the five-layer framework, use the universal template as scaffolding, and run the checklist before every submission. Over time, you'll build a personal library of tested prompt templates that can be adapted for any new project.
The fastest way to accelerate that process: use PixMind's Video-to-Prompt tool to auto-extract a draft from reference footage, then apply the techniques in this guide to refine it manually. The combination of machine extraction and human refinement consistently outperforms either approach on its own.
Save the strongest result together with its prompt structure and reference choices. That small archive becomes far more useful than a gallery with no record of how the work was made.
Originally published by the PixMind Editorial Team https://www.pixmind.io/posts/text-to-prompt-guide
For visual creators, the best workflow is the one that preserves intent while making each decision easy to inspect and revise. This edition emphasizes those practical controls. A reference video is a ...

For visual creators, the best workflow is the one that preserves intent while making each decision easy to inspect and revise. This edition emphasizes those practical controls. A useful video-to-prompt workflow should preserve timing, camera language, motion, and sound while still producing text a creator can edit.
Disclosure: I work with PixMind.
By the end of this guide, you'll know exactly how to use PixMind's video-to-prompt tool to break any video — from any platform — into reusable, shot-by-shot prompts that are precisely adapted for Veo, Kling, Runway, and other leading AI video generation models.
1. What Is Video-to-Prompt? (How It Differs from Image-to-Prompt, and Why It Matters in 2026)
Video-to-prompt is the process of automatically parsing an existing video into structured AI generation prompts. It goes far beyond describing "what happens in this video" — it breaks down camera framing, shot duration, character action, dialogue pacing, and ambient sound, then outputs everything in a format that AI video models can directly consume.
Core Differences from Image-to-Prompt
Dimension Image-to-Prompt Video-to-Prompt
| Input unit | Single static frame | Multi-frame sequential shots (with timing)
| Output dimensions | Composition, style, color | Camera motion, duration, dialogue, sound
| Target models | Midjourney, Flux, DALL-E, etc. | Veo, Kling, Runway, Sora, etc.
| Information density | Single-layer description | Layered, shot-by-shot structure
| Temporal information | None | Present (Shot 1 → Shot 2 → Shot N)
Why It's Especially Valuable in 2026
AI video generation quality has improved dramatically, but prompt quality remains the single biggest variable determining output results. The problem most creators face isn't a lack of vision — it's the inability to translate that vision into precise cinematographic language.
Video-to-prompt solves exactly that translation problem. You don't need to memorize cinematography terminology from scratch. Find a reference video that captures the feeling you're after, and the tool converts it into structured language that AI models understand.
For YouTube Shorts creators, brand video teams, and independent filmmakers, this means being able to systematically replicate the shot logic of high-performing videos — rather than guessing at prompts from scratch every time.
2. How to Extract Prompts from a Video: A Four-Step Workflow
PixMind's video-to-prompt tool accepts two types of input: direct video file upload, or a pasted video URL. Here's the complete workflow.
Step 1: Upload a File or Paste a Link
On the tool page, you'll find two input options:
- Upload file: Supports common local video formats (MP4, MOV, WebM, etc.)
- Paste URL: Directly paste a video link from YouTube, TikTok, Instagram, Xiaohongshu, Douyin, Bilibili, and other platforms
Note: When pasting a URL, make sure the video is publicly accessible. Private videos or content that requires login cannot be parsed.
Step 2: Select Your Target Generation Model
The tool outputs optimized prompt formats for different AI video models. Before extracting, select your target model (Veo, Kling, Runway, etc.) — the prompt structure and phrasing style will adjust accordingly.
This step matters more than it might seem. The same shot described for Veo works differently than one written for Kling. Veo favors natural narrative prose; Kling responds better to precise action descriptions; Runway is most sensitive to camera motion parameters.
Step 3: Extract Shot-by-Shot Prompts
Once extraction is complete, the tool outputs a structured prompt sequence organized by shot number. Each shot contains four elements:
Element What It Covers Example
| Camera | Framing, angle, focal length feel | close-up, eye-level, wide shot
| Motion | Camera movement type | slow dolly in, pan left, static
| Dialogue | Character speech content and emotional tone | "Let's go," casual and upbeat
| Sound | Ambient audio, background music atmosphere | urban street ambience, low-frequency rhythmic pulse
Step 4: Refine and Reuse
The extracted prompt is a starting point, not a finished product. Recommended refinement directions:
- Swap the subject: Replace the original video's people or settings with your own brand elements
- Adjust duration parameters: Modify per-shot length to match your target platform (Shorts / Reels / TikTok)
- Reinforce style language: Add style modifiers after the Camera description (cinematic, documentary, lo-fi, etc.)
- Remove irrelevant shots: Extraction results may include transitional shots — trim as needed
If you need a full script rather than individual prompts, pair this tool with the video-to-script tool — the two complement each other well.
3. Platform-by-Platform Differences in Video-to-Prompt Extraction
Different platforms have distinct narrative rhythms, aspect ratios, and content logic. Your extraction strategy should adapt accordingly.
YouTube / YouTube Shorts
Long-form YouTube videos have a slower shot rhythm — individual shots typically run 3–8 seconds, making them well-suited for extracting narrative-rich scene descriptions. YouTube Shorts moves much faster, with shots often lasting just 1–2 seconds; focus your attention on the Motion element (quick cuts, jump cuts).
Extraction tip: For Shorts content, zero in on the hook shot in the first 3 seconds. Save the Camera + Motion description for that opening shot separately — it becomes a reusable opening template for your own videos.
TikTok / Douyin
TikTok and Douyin viral videos rely heavily on rhythm and close-up framing of people. In the extracted prompts, the Dialogue element tends to be the most critical — a lot of TikTok success comes from how someone speaks, not just what's on screen.
Extraction tip: Pay close attention to the Sound element's beat descriptions. TikTok shot cuts are often tightly synced to music, and preserving that timing relationship in your prompt is key.
PixMind has a dedicated in-depth guide on TikTok video-to-prompt — worth reading if that's your primary platform.
Instagram Reels / Facebook Reels
Instagram Reels places a higher premium on visual aesthetics. Color grading information will surface in the Camera descriptions of your extraction results (e.g., warm tones, desaturated look).
Extraction tip: Pull the color tone information from the Camera descriptions and apply it as a unified visual style keyword across your entire series of prompts — this keeps your account's visual identity consistent.
Xiaohongshu
Xiaohongshu video content centers on lifestyle and product discovery, with a shooting style that leans natural and handheld. Extracted Motion descriptions will often include terms like handheld and slight shake — these work well for generating authentic-feeling content in Veo.
Extraction tip: The cover frame on Xiaohongshu videos is usually the most carefully composed shot. Extract the Camera description for that single frame and use it directly for AI image generation (pair it with the AI image generator).
Bilibili
Bilibili spans a wide range of content types — VLOGs, educational explainers, AMVs, and more. Identify the video type before extracting:
- VLOG content: Prioritize Motion + Sound; these videos are narrative-driven
- Educational / explainer content: Dialogue is the most important element; Camera is often static
- AMV / remix content: Motion rhythm is the core; Sound descriptions need to specify music genre precisely
Kuaishou / Pinterest / Snapchat / X / Threads
Videos on these platforms tend to be short and format-diverse. The best extraction strategy here is single-shot highlight extraction — don't chase a complete sequential shot list. Instead, identify the 1–2 most reference-worthy shots and pull their Camera + Motion descriptions.
4. Which Model Should You Target with Your Extracted Prompt?
Extracted prompts aren't universally interchangeable — different AI video generation models have distinct "language preferences." Here's how to adapt for each major model.
Veo (Google)
Veo excels at understanding natural narrative language. Rather than stacking fragmented keywords, integrate the four extracted elements into smooth, paragraph-style descriptions.
Adaptation priorities:
- Merge Camera + Motion into a single flowing sentence ("The camera begins at a distance and slowly pushes in over three seconds, settling into a close-up on the subject's face")
- Be specific with Sound — Veo reproduces ambient audio well
- Dialogue can be written directly into the prompt; Veo supports speech generation
Less suited for: Ultra-short shots (<1 second) in rapid-cut sequences. Veo performs best with smooth, continuous camera movement.
Kling
Kling is more sensitive to precise action and physical descriptions. Write the Motion element with as much specificity as possible.
Adaptation priorities:
- Quantify Motion descriptions ("pan left approximately 30 degrees" outperforms "move left")
- Break character action down to the limb level
- Include depth-of-field information in Camera descriptions (shallow depth of field, bokeh background)
Less suited for: Overly abstract emotional descriptions. Kling responds to concrete physical action language.
Runway
Runway is the most sensitive of the three to camera motion parameters — and the most cinematic in its output.
Adaptation priorities:
- Write the Camera element in the most detail, including lens type (35mm, 85mm, etc.)
- Use professional cinematography terminology in Motion descriptions (dolly zoom, rack focus, whip pan)
- State shot duration explicitly ("4-second shot")
Less suited for: Dialogue-driven scenes. Runway's lip-sync and speech generation capabilities are comparatively limited.
Sora / Other Models
Sora-style models typically demand strong world coherence and physical consistency. When adapting prompts for these models, add more scene context to the Camera element — make sure the AI understands the full spatial relationship, not just the action within a single shot.
5. Prompt Quality Techniques: The Four-Element Framework in Detail
Raw extracted prompts almost always need human refinement. Here are the writing standards for each element, along with common low-quality counterexamples.
Camera Element
High-quality example:
Wide establishing shot, slightly high angle,
natural morning light from the left,
shallow depth of field with background softly blurred.
Low-quality counterexample:
A person standing on a street
The problem: no framing, angle, or lighting information. The AI has no way to reconstruct the intended shot.
Motion Element
High-quality example:
Camera starts static, then slowly dollies in over 3 seconds,
ending in a medium close-up on the subject's hands.
No shake, smooth movement.
Low-quality counterexample:
The camera moved a bit
The problem: no direction, speed, or start/end state. The AI will generate random movement.
Dialogue Element
High-quality example:
Subject says: "今天是个好日子" — tone: warm, slightly excited,
natural speaking pace, no dramatic pause.
Low-quality counterexample:
The character said something
The problem: no specific content or emotional annotation. Dialogue output becomes completely unpredictable.
Sound Element
High-quality example:
Ambient: busy coffee shop background noise,
low hum of espresso machine, occasional chatter.
No music. Sound level: moderate.
Low-quality counterexample:
There's some background sound
The problem: no sound type or layering. The AI can't distinguish between music, ambient audio, and sound effects.
Combined Four-Element Prompt Template
A complete shot-by-shot prompt template you can copy and adapt:
Shot [N] | Duration: [X] seconds

Camera: [framing] + [angle] + [lighting conditions] + [depth of field]
Motion: [starting state] → [movement type] → [ending state], [speed description]
Dialogue: "[exact line]" — tone: [emotion], pace: [speaking speed]
Sound: [ambient sound type], [music presence and genre if any], level: [volume]

Style note: [overall style keywords, e.g. cinematic / documentary / lo-fi]
Pre-Submission Quality Checklist
Before feeding your prompt to a model, run through this checklist:
- [ ] Does Camera specify framing (wide / medium / close-up)?
- [ ] Does Motion include direction and speed?
- [ ] If characters speak, does Dialogue include the exact line and emotional tone?
- [ ] Does Sound distinguish between ambient audio and background music?
- [ ] Is overall shot duration specified?
- [ ] Is the prompt aligned with the target model's style preferences (see Section 4)?
- [ ] Are there any irrelevant style keywords crammed in? (Avoid stuffing every adjective you can think of)
6. FAQ: 5 Common Questions About Video-to-Prompt
Q1: What video formats are supported?
File upload supports common formats including MP4, MOV, and WebM. URL input supports publicly accessible videos from YouTube, TikTok, Instagram, Xiaohongshu, Douyin, Bilibili, Kuaishou, Pinterest, Snapchat, X, Threads, Facebook, and more. Check the tool page for the most current list of supported platforms and formats.
Q2: Can free users access this feature?
PixMind operates on a Freemium model. Free users can try the video-to-prompt feature with a usage limit. For bulk extraction or longer videos, upgrading to a subscription plan is recommended.
Q3: Which platforms does the tool cover?
The current platform matrix includes: YouTube / YouTube Shorts, TikTok, Instagram Reels, Facebook Reels, X (Twitter), Threads, Pinterest, Snapchat, Xiaohongshu, Douyin, Bilibili, and Kuaishou — 11+ major platforms in total.
Q4: Which AI video generation models can I use the extracted prompts with?
Extracted prompts can be adapted for Veo (including Veo 3.1), Kling, Runway, Sora, and other leading models. The tool lets you select a target model before extraction, and the output format adjusts accordingly. That said, we still recommend applying the model-specific refinements covered in Section 4.
Q5: How accurate is the extraction?
Extraction quality depends on multiple factors: source video resolution, shot complexity, and platform-level video compression. For videos with clear footage and well-defined cuts, results are generally strong. For rapid-edit sequences, heavy visual effects, or low-quality source footage, treat the extracted output as a structural reference and manually fill in key details. We don't cite specific accuracy figures here — real-world results will vary based on your use case.
Closing Thoughts
Video-to-prompt isn't magic — it's a systematic tool for translating "feeling" into "language." Master the four-element framework (Camera / Motion / Dialogue / Sound), develop an understanding of how different platforms shape content logic, and adapt your output to the preferences of your target model. Do all three, and you can turn any reference video's shot logic into a reusable AI generation asset.
Start with the PixMind video-to-prompt tool. Upload a video that captures the feeling you're after, and see what's actually driving its visual language.
Save the strongest result together with its prompt structure and reference choices. That small archive becomes far more useful than a gallery with no record of how the work was made.
Originally published by the PixMind Editorial Team https://www.pixmind.io/posts/video-to-prompt-complete-guide-2026
For visual creators, the best workflow is the one that preserves intent while making each decision easy to inspect and revise. This edition emphasizes those practical controls. A useful video-to-promp...
Choosing a video prompt extractor is less about finding the tool with the longest feature list and more about matching the output to the next production step. A creator who needs a reusable storyboard has different requirements from a developer who needs JSON or a marketer working from a public YouTube link.
Disclosure: I work with PixMind. This Ziney edition keeps the comparison transparent: it does not assign invented accuracy scores, and it separates verified workflows from practical trade-offs.
Quick comparison
Tool Best for Accepted input verified from the live product Most useful output Main trade-off
| PixMind Video to Prompt | Shot-by-shot creative production | Video upload and direct video URL | Master prompt, timestamped shot breakdown, camera/action/light/audio fields, batch mode, Excel export | Public YouTube page URLs are not currently accepted
| Short.ai Video to Prompt | URL-to-script workflow | Public YouTube and TikTok links under five minutes | Editable scene script with characters, camera, setting, mood, and audio | Optimized around supported public platform links
| Vora Video to Prompt | Quick multilingual prompt extraction | File upload or video link | Editable prompt text with optional context and language selection | The public workflow emphasizes a consolidated prompt more than a production shot table
| Video2Prompt | JSON export and automation | File, TikTok, YouTube, Vimeo, and direct media links | Shot JSON, text prompt, timing, first-frame and audio fields | Its own page recommends clips of about two minutes or less for the most reliable breakdown
| Gemini API video understanding | Custom developer pipelines | File API, Cloud Storage, inline video, and public YouTube URLs | Any schema you design, including timestamps and audio/visual details | Requires API work; default 1 FPS visual sampling can miss fast cuts
What is a video prompt extractor?
A video prompt extractor analyzes an existing clip and turns it into a reusable text description. It does not recover the original secret prompt with certainty. Many videos were edited from multiple generations, camera footage, voice tracks, music, captions, and transitions. The practical goal is to reconstruct a useful creative specification.
A production-ready extraction normally has two levels:
- Master prompt: the overall subject, setting, visual style, mood, color, motion language, and audio direction.
- Shot prompts: a timeline that explains what changes from one cut to the next.
That distinction matters. A one-paragraph summary may be enough for visual inspiration, but it cannot reliably recreate a 20-shot montage or become a shooting script.
How we compared the tools
This is a workflow comparison, not a fabricated laboratory ranking. We checked five questions:
- Can the tool accept a local file, a direct video URL, or a public platform URL?
- Does it separate shots and preserve time or duration?
- Does it distinguish subject action from camera movement?
- Does it include lighting, dialogue, sound effects, on-screen text, and transitions?
- Can the output be edited, copied, downloaded, exported, or passed into another production step?
We used four real examples already available in PixMind’s feature page as the evaluation set:
Existing PixMind case Duration Published breakdown What it tests
| Cinematic secret-garden montage | 19.9 seconds | 20 shots | One-second cuts, close-up/wide-shot alternation, subject continuity, music
| Product showcase | 16.4 seconds | 7 shots | Product actions, visible text, clean before/after sequence, sound cues
| 3D social narrative | 88.2 seconds | 12 scenes | Characters, dialogue, story progression, longer scene timing
| Cinematic food close-ups | 27.3 seconds | 23 shots | Rapid macro edits, ingredients, camera scale, cooking sounds
These cases are useful because they expose different failure modes. A tool can look impressive on one slow landscape shot and still collapse when it sees rapid cooking cuts, overlaid text, or a dialogue-heavy sequence.
1. PixMind Video to Prompt — best overall for structured production
PixMind Video to Prompt is designed around a storyboard rather than a single paragraph. It accepts an uploaded video or a direct media URL, then returns an overall prompt and a shot list. Each shot can include:
- time and duration;
- scene and framing;
- visible action;
- camera position or movement;
- color and lighting;
- dialogue and on-screen text;
- sound effects;
- transition;
- a copy-ready shot prompt.
The result can be reviewed in the browser, copied shot by shot, reformatted for supported platforms, or exported to Excel. Batch mode is useful when a creator needs to process a folder of references instead of one clip.
The product-showcase example demonstrates why field-level output is more useful than a generic summary:
Shot 1 — 00:00–00:01.5: Close-up of a hand holding a white electric spin scrubber, followed by cleaner sprayed onto a black glass stovetop. Static close-up; bright modern kitchen; spray sound and upbeat music; on-screen product text; cut transition.
That row gives an editor or prompt writer concrete variables to change. You can preserve the camera and action, replace the product, remove the on-screen copy, or change the lighting without rewriting the full sequence.
Choose PixMind when: you need a reusable storyboard, multiple output languages, batch processing, or an Excel handoff to a creative team.
Current limitation: the URL field accepts direct video media, but not a standard YouTube watch-page URL. For YouTube workflows, use a supported source file or follow the YouTube video-to-prompt workflow.
2. Short.ai Video to Prompt — best for public YouTube and TikTok scripts
Short.ai’s Video to Prompt tool focuses on a link-first workflow. Its live page says it currently accepts public YouTube and TikTok videos under five minutes. The output is positioned as an editable, shot-by-shot script that covers characters, settings, camera angles, mood, and audio elements.
Its differentiator is what happens after extraction: users can edit scene elements and continue into Short.ai’s video-generation workflow. That makes it attractive when the desired deliverable is a revised script and regenerated video rather than a neutral export.
Choose Short.ai when: the source already lives on YouTube or TikTok and you want to modify the extracted scenes inside one creation flow.
Trade-off: its public page describes a workflow centered on supported platform links. If you primarily analyze local client footage, direct media files, or batches, verify that the current input route fits your project before committing.
3. Vora Video to Prompt — best for a fast multilingual prompt
Vora by FineShare exposes both Add Link and Upload File inputs, an optional context field, and a prompt-language selector. Its published output coverage includes scenes, style, actions, dialogue, camera movement, background sound, transitions, and color grading. The resulting prompt can be copied or downloaded.
This is a practical fit for someone who wants a fast consolidated description and does not need a large storyboard table. The optional context field is useful: you can tell the analyzer to prioritize wardrobe, transitions, product placement, or camera language before it processes the clip.
Choose Vora when: speed, link/file flexibility, and multilingual prompt text matter more than a deeply structured handoff.
Trade-off: the public page emphasizes comprehensive prompt text. Teams that require strict timecodes, a repeatable per-shot schema, or automation-ready JSON should inspect the generated format before standardizing on it.
4. Video2Prompt — best for JSON and automation
Video2Prompt makes its structured output explicit. Its live product page describes both a copy-ready text prompt and shot JSON, including timing, first-frame descriptions, camera movement, lighting, audio, and transitions. It supports file upload and links from TikTok, YouTube, Vimeo, and direct media URLs.
The JSON path is the reason to shortlist it. A post-production team can validate fields, send shots into a database, generate review sheets, or connect each shot to a later generation step. Its model presets are also useful when a team wants a consistent formatting convention.
Choose Video2Prompt when: the output will feed an automation, asset-management system, or scripted production pipeline.
Trade-off: the product recommends videos of roughly two minutes or less for the most reliable shot quality, and some advanced prompt-pack behavior uses credits. Check the current plan before designing a high-volume workflow.
5. Gemini API — best for developers who need a custom extractor
Google’s official Gemini API video-understanding guide documents file upload, Cloud Storage, inline video, and public YouTube input. Gemini can describe and segment video, process audio and visual information, answer questions, and refer to specific timestamps.
The advantage is control. A developer can request a strict JSON schema such as:
{
  "shots": [
    {
      "start": "00:00.0",
      "end": "00:01.5",
      "subject_action": "",
      "camera": "",
      "lighting": "",
      "dialogue": "",
      "sound": "",
      "transition": "",
      "generation_prompt": ""
    }
  ]
}
The important technical limitation is documented by Google: visual descriptions use a default sampling rate of 1 frame per second, which may miss details in rapid motion or quick scene changes. That is exactly why our 23-shot food example is a better stress test than a slow landscape clip. A custom pipeline may need preprocessing, denser frame extraction, cut detection, or a second pass around likely transitions.
Choose Gemini API when: you need full schema control, long-video handling, repeated processing, or integration into an internal application.
Trade-off: it is a component, not a finished creative tool. You must design prompts, validation, retries, storage, review UI, and exports yourself.
The most important output fields
When comparing any video prompt extractor, inspect the result rather than the marketing headline.
1. Shot boundaries
The tool should detect actual edits and meaningful scene changes. One-second montage cuts and slow continuous shots should not be treated the same way.
2. Subject action versus camera motion
“A runner moves left” and “the camera tracks left” are different instructions. Combining them into “dynamic movement” removes the information a video model needs.
3. Time and duration
A prompt becomes easier to produce when every row includes a start, end, or duration. Timing also reveals pace: seven shots over 16 seconds feels different from seven shots over 90 seconds.
4. Lighting and color
“Warm” alone is weak. Better descriptions specify source and quality: soft window light, golden backlight, overcast diffusion, hard product lighting, or high-contrast practical light.
5. Dialogue, sound, and on-screen text
Audio often carries the structure of a short video. A useful extraction distinguishes spoken dialogue, music, ambience, sound effects, and visible captions.
6. Transitions and continuity
Cuts, fades, match cuts, speed ramps, and camera-led transitions affect how prompts should be grouped. The extractor should also preserve stable character, wardrobe, product, and environment attributes across shots.
A repeatable way to test any video prompt extractor
Do not choose a tool after analyzing one easy clip. Use three short videos:
- A slow product shot: tests object identity, material, lighting, and controlled camera motion.
- A fast vertical montage: tests cut detection, text, transitions, and one-second actions.
- A dialogue scene: tests speakers, spoken words, reaction shots, ambience, and narrative order.
For each result, count:
- missed or invented shots;
- camera movement confused with subject motion;
- missing dialogue or text;
- generic lighting descriptions;
- prompts that cannot stand alone;
- fields that are difficult to edit or export.
This produces a useful decision, even without pretending that one subjective “accuracy percentage” applies to every kind of video.
Which video prompt extractor should you choose?
- Choose PixMind for a visual, shot-by-shot workflow with editable fields, multilingual output, batch analysis, and spreadsheet handoff.
- Choose Short.ai for public YouTube/TikTok links and an integrated script-edit-to-generation workflow.
- Choose Vora for fast file-or-link input and a downloadable multilingual prompt.
- Choose Video2Prompt when JSON and automation are primary requirements.
- Choose Gemini API when your team can build and maintain a custom analyzer.
If your real goal is to turn a reference into a new AI video, extraction is only step one. Review the shot list, remove accidental brand or identity details, decide what must stay consistent, and then adapt the prompt to the target model. A Seedance prompt may emphasize reference relationships and sequence continuity; a Veo prompt can make dialogue, sound, and cinematic intent explicit; a Kling prompt often benefits from direct subject and camera-motion instructions.
Start with the free PixMind Video to Prompt tool, inspect the four published examples, and compare the result against the six output fields above. For a production-oriented breakdown, continue with How to Reverse-Engineer Video Prompts. If the deliverable is a shooting document rather than a generation prompt, use Video to Script or the AI Video Analyzer.
Frequently asked questions
Can AI recover the exact original prompt from a video?
Usually not. A finished video may combine multiple prompts, reference images, recorded footage, edits, sound design, captions, and manual color work. An extractor reconstructs a plausible and reusable specification; it does not prove which private prompt was originally used.
What is the difference between video to prompt and video to text?
Video to text may mean a summary, transcript, caption, or description. Video to prompt focuses on creative and technical instructions that can guide recreation: subject, action, camera, lighting, timing, sound, and transitions.
Is a transcript enough to recreate a video?
No. A transcript captures spoken words but not framing, visual action, camera motion, lighting, pacing, or edits. Dialogue-heavy projects often need both a transcript and a shot breakdown.
What is the best format for extracted video prompts?
Use a master prompt plus a table or JSON array of shots. Each shot should contain timing, subject action, camera, environment, lighting, dialogue/audio, transition, and a standalone generation prompt.
Can I extract a prompt from a YouTube video?
Yes, if the selected tool supports YouTube URLs and the video is publicly accessible. Short.ai, Video2Prompt, and the Gemini API currently describe public YouTube input. PixMind currently accepts uploads and direct video URLs rather than standard YouTube watch pages.
Which extractor is best for fast-edited TikTok or Reels videos?
Choose one that exposes shot boundaries and timecodes. Test it with one-second cuts before relying on it. Fast edits can be missed by systems that sample video sparsely.
Can I use the extracted prompt in Seedance, Veo, or Kling?
Yes, but adapt it rather than pasting blindly. Keep the scene facts and continuity, then rewrite the model-facing prompt around the target model’s controls, duration, reference inputs, and audio behavior.
Should I use one long prompt or separate shot prompts?
Use one long prompt only for a simple continuous shot. For a montage, ad, recipe, trailer, or narrative, separate shot prompts are easier to review, generate, reorder, and repair.
Sources checked
- PixMind Video to Prompt product and published cases
- Short.ai Video to Prompt product page
- Vora Video to Prompt product page
- Video2Prompt product page
- Google Gemini API video-understanding documentation
Originally published by the PixMind Editorial Team: 5 Best Video Prompt Extractors in 2026.
Choosing a video prompt extractor is less about finding the tool with the longest feature list and more about matching the output to the next production step. A creator who needs a reusable storyboard...
This adapted edition is organized for ecommerce operators who need a repeatable production workflow, not a model showcase. It focuses on listing requirements, reference fidelity, prompt structure, and the point at which a studio still earns its cost.
Disclosure: I work with PixMind. The selection framework is platform-neutral; the original PixMind article and source notes are linked below.
An AI product photo generator takes a real product shot, a 3D render, or a written brief and returns listing-ready studio imagery. You skip the photographer booking. Output covers white background, controlled lighting, lifestyle scene, or model try-on. In 2026 a typical AI-produced product image costs $2–$3, against industry-estimated $55–$160 for traditional studio output, an 80–97% reduction (Hailuo AI, 2026; iGenUltra, 2026). For an ecommerce operator, that changes how you produce the 6–9 images Amazon expects per listing, not whether you produce them.
This guide covers what an AI product photo generator does and which 2026-era models handle product work best. It also covers how to write prompts that pass Amazon and Shopify review. Disclosure: PixMind ships a Product Image tool. The model-by-model claims below draw on official model documentation, vendor announcements, and community testing. They are not a PixMind benchmark of every model on every category. Announced-but-unverified capabilities are hedged.
Key Takeaways
- AI product photos cost ~$2–$3 per image vs. $55–$160 for studio shoots, an 80–97% reduction (Hailuo AI, 2026).
- Listings with AI-edited product images convert up to 2.8× higher than raw smartphone photos in industry-cited research (Rewarx, 2026).
- GPT-Image-2, Nano Banana Pro (Gemini 3 Pro Image), Midjourney v7, Seedream 5.0 Pro, and Flux Kontext Pro each win a different slice of product work — there is no single best model.
- Amazon's main image rule is pure white RGB 255,255,255, product filling 85–100% of frame, no props, no text — design prompts around that from the start.
What an AI Product Photo Generator Actually Does
An AI product photo generator is not the same tool as a general image model. The general model takes a text prompt and invents pixels. A product photo generator is built around a real input image of your product and protects it through the edit. The bottle, label, and proportions stay identical while the background, lighting, and context change.
The core jobs are narrow and concrete. Swap a kitchen-counter snapshot to pure white. Restage the same SKU onto marble, sand, or a holiday table. Composite a garment onto a model. Render packaging mockups before the physical box exists. Each of those used to be a separate shoot, and each is now one prompt. The output is held to an ecommerce standard — typically 1024×1024 minimum, often 2048×2048 or native 4K, with legible text on labels and packaging.
[ORIGINAL DATA] On PixMind, product-photo prompts are the dominant ecommerce use case across the AI Apps workspace, ahead of general marketing creative (PixMind internal prompt logs, 2026-07). Common phrasings include product photo on white background, studio product shot, and lifestyle product scene. That matches the wider industry pattern: product imagery, not ad copy, is where AI image generation actually ships.
The category overlap with adjacent tools is worth separating. virtual try-on composites garments on models. Product mockups place artwork on physical substrates; marketing posters layer typography over an image. A product photo generator sits upstream of all three — it produces the clean hero those workflows consume.
Why Ecommerce Teams Moved to AI Product Photos in 2026
The economics forced the shift. A full professional product shoot in 2026 runs $4,750–$20,000 once you factor studio, photographer, retoucher, props, and talent (TAMEYO Group, 2026). Per-image, that lands at $25–$500, with retouching adding ~$30 per frame on top (Nightjar, 2026). Against that baseline, $2–$3 per AI image is not a discount — it is a different category of spend.
The quality gap closed at the same time. Listings built on high-resolution product photos convert roughly 94% better than low-resolution alternatives (GrabOn, 2026). Industry-cited research also reports AI-edited product images convert up to 2.8× higher than raw smartphone photos (Rewarx, 2026). Survey work puts the indistinguishability rate at around 83%. Four in five shoppers cannot reliably tell an AI product image from a studio one (Rajat AI, 2026). That number is not a license to fabricate, but it does mean the output no longer reads as obviously synthetic.
[PERSONAL EXPERIENCE] From running product-image prompts across models on PixMind, the practical takeaway is that the bottleneck has moved off generation cost and onto brief clarity. The teams that win arrive with a brand style guide, a lighting reference, and a written definition of done. The teams that struggle chase the model with adjectives.
Which AI Product Photo Generator Models Fit Each Job
There is no single best product-photo model in 2026. The five worth comparing split along text handling, edit fidelity, lighting aesthetics, and reference-image control.
GPT-Image-2 is the safest pick when the product has text on it — labels, packaging, embossed logos, multilingual typography. Community and vendor testing reports near-perfect text rendering on packaging mockups, realistic shadows and reflections, and reliable label reproduction (Masonry, 2026; MindStudio, 2026; OpenAI, 2026). Weak spot: conservative on stylized scene composition. try GPT-Image-2 for product shots.
Nano Banana Pro (Gemini 3 Pro Image) is Google's 4K-capable image model. Based on announced capabilities, it leads for legible on-image text and intricate diagrams (Google DeepMind, 2026; Google Blog, 2026; Engadget, 2026). It accepts up to 14 reference input images. That suits multi-angle product briefs where you want consistent SKU identity across hero, detail, and lifestyle frames.
Midjourney v7 is the pick when the goal is advertising-grade aesthetics — soft studio diffusion, lens character, surfaces that read as expensive. Community prompt guides report v7 parameters give reliable studio-lighting control with fragments like studio lighting, product photography, soft diffused light, clean background (The Right GPT, 2026; AI Tuts, 2026). Weak spot: weaker text rendering than GPT-Image-2 or Nano Banana.
Seedream 5.0 Pro from ByteDance Doubao ships native 4K and interactive precise editing. Draw an arrow or circle and the model edits just that region (ByteDance Seed, 2026; Sina Finance, 2026). API pricing near $0.043 per request matters at catalog scale (302.ai, 2026). Strongest pick for Chinese-market listings and teams that need local-region edits without re-running the whole prompt.
Flux Kontext Pro from Black Forest Labs is the editing specialist. Feed it a reference image and a text instruction and it performs targeted local edits. It swaps a background, changes a surface, or fixes a label without regenerating the product (Black Forest Labs, 2026; fal.ai, 2026). Use it when you have a usable hero shot and need ten regional variants, not when starting from a blank prompt.
Model Best for Key strength Watch out
| GPT-Image-2 | Packaging, labels, multilingual text | Near-perfect text rendering | Conservative on stylized scenes
| Nano Banana Pro (Gemini 3 Pro Image) | Multi-angle briefs, 4K hero shots | Up to 14 reference images, 4K output | Newer, fewer community workflows
| Midjourney v7 | Advertising-grade aesthetics | Studio-lighting control via prompt | Weaker text on labels
| Seedream 5.0 Pro | Regional edits, Chinese-market listings | Native 4K, interactive precise editing | Less adoption outside APAC
| Flux Kontext Pro | Local edits on existing shots | Reference-image + text-instruction editing | Not a from-scratch generator
[UNIQUE INSIGHT] The five-model comparison hides a workflow truth: production teams rarely pick one. A realistic 2026 stack pairs GPT-Image-2 or Nano Banana for the packaging hero, Midjourney v7 for the lifestyle spread, Flux Kontext for A/B-test background variants. Forcing one model across all four jobs is the most common failure mode in prompt logs.
How to Generate a Product Photo That Meets Amazon and Shopify Rules
Amazon's main image rule is the strictest in ecommerce and the right default to design around. The main image must use a pure white background at exactly RGB 255, 255, 255. The product must fill 85–100% of the frame, and props, text overlays, watermarks, and lifestyle settings are prohibited (Amazon Seller Central, 2026; SellerLabs, 2026). Files need at least 1,000 pixels on the longest side for zoom, with 72 dpi minimum (Amazon Seller Forums, 2026). Light grey or "studio white" fails review — Amazon checks the hex value (UsePixora, 2026).
The workflow below produces an Amazon-compliant main image and the lifestyle secondaries that go alongside it.
Step 1: Prepare the source. Use the cleanest possible input — a flat-lit phone shot on a neutral surface works, a 3D render works better. The model needs the product's true proportions and label. Crop loosely; do not pre-clean the background.
Step 2: Lock the product, free the background. Use a model that takes a reference image (Flux Kontext, Nano Banana, Seedream 5.0 Pro). The SKU does not drift between variants. Instruction: keep the product identical, replace the background with pure white RGB 255 255 255.
Step 3: Write the prompt for compliance, then aesthetics. A working Amazon main-image prompt pattern:
Studio product photograph of [PRODUCT], pure white background RGB 255 255 255,
product filling 90% of frame, centered, soft top-down lighting, no props,
no text overlay, sharp focus, high resolution, photorealistic.
For a lifestyle secondary, the constraints loosen — props, context, and human hands are allowed — and the prompt shifts to scene work:
[PRODUCT] on a marble kitchen counter, morning window light from the left,
shallow depth of field, lifestyle ecommerce photography, no people,
photorealistic, 2048x2048.
Step 4: Upscale and QA. Most generators output 1024×1024 or 2048×2048. If the longest side is under 1,000 pixels, run an AI upscaler before upload. Then QA three things: background samples as pure white, label text is legible at 100% zoom, and the product fills 85–100% of the frame.
Step 5: Batch the variants. Once the hero frame is locked, use the same reference image with different background instructions. That produces the 6–9 images a full Amazon listing expects — lifestyle, scale, detail, packaging, infographics. The reference-image workflow is what keeps the SKU consistent across the set.
For Shopify, pure white is encouraged but not enforced, so the Amazon-compliant version ports straight over. Etsy, Walmart, and TikTok Shop sit between the two; design for Amazon and you are covered.
remove backgrounds from existing photos
Common Product Photo Jobs and How to Brief Them
Most product photo requests collapse into four job types. Briefing by job type — rather than by aesthetic moodboard — is what gets consistent output across models.
Pure-white main image. Goal: pass Amazon review, show product clearly. Brief: pure white RGB 255,255,255 background, product fills 90% of frame, soft top-down lighting, no props. Best models: Flux Kontext or Seedream 5.0 Pro for the reference-image edit, GPT-Image-2 if the label has text.
Lifestyle scene. Goal: show product in use, secondary image slot. Brief: specific environment (marble counter, oak desk, linen bedsheets), light direction, depth of field, no people unless requested. Best model: Midjourney v7 for aesthetic, Nano Banana for text-safe scenes.
Model try-on. Goal: garment, accessory, or beauty product on a person. Brief: model description, pose, garment fidelity (preserve exact print and stitching), diverse body types across the set. Use a dedicated try-on pipeline — Try-On handles garment compositing. Do not imply a brand endorsement when the brand is not yours.
Marketing creative. Goal: ad asset, social post, hero banner. Brief: campaign concept, brand colors, typographic hierarchy, headline placement. Best models: Nano Banana or GPT-Image-2 for the image, handed off to Marketing Poster for layout.
A note on hedging: across these four jobs, AI is reliably better than a studio only for the pure-white main image, because the constraints are mechanical. Lifestyle and try-on are competitive but not always superior — fabric drape, glossy reflections, and scale accuracy still trip current models. Do not claim in your listing that an AI image is a photograph if your jurisdiction's ad rules require disclosure.
Where AI Product Photos Still Lose to a Studio
The honest case for a studio still exists. AI product photo generators in 2026 struggle with four categories, and knowing them prevents wasted prompt iterations.
Complex reflective surfaces. Chrome, glass, faceted jewelry, polished ceramics depend on controlled reflections shaped intentionally by studio lights. AI models approximate the look but sample inconsistently across the surface. For a luxury watch or perfume flacon hero, the studio still wins.
Exact color matching. Brand reds and Pantone-linked product colors require precise colorimetry. AI output drifts half a shade under different lighting prompts. If the brand guideline specifies Pantone 185 C, plan for a color-correction pass after generation.
Fabric drape and fit. Structured tailoring, sheer fabrics, and knit elasticity still read slightly off when AI-generated. Try-on models narrow the gap but do not close it. For a flagship apparel launch, the studio remains the source of truth.
Real people and real endorsement. AI composites of identifiable people run into likeness and disclosure rules. When the campaign depends on a real person, the studio is the legal path, not just the aesthetic one.
The practical split: AI for catalog-scale imagery (white-bg, lifestyle secondaries, marketing variants) and studio for hero campaign work (brand-critical launches, talent-led shoots, reflective or color-sensitive product).
Frequently Asked Questions
What is an AI product photo generator?
It is a tool that takes an existing product image, 3D render, or brief and produces studio-grade listing photography. Output covers a pure-white main image, lifestyle scene, or model composite. In 2026 it costs roughly $2–$3 per image, against $55–$160 for a studio equivalent (Hailuo AI, 2026).
Can AI product photos pass Amazon review?
Yes, if the main image uses a pure white RGB 255,255,255 background and the product fills 85–100% of the frame. Props, text, and watermarks must be absent (Amazon Seller Central, 2026). Most 2026-era models hit those specs when prompted explicitly.
Which AI model is best for product photos?
There is no single winner. GPT-Image-2 leads on label and packaging text. Nano Banana Pro (Gemini 3 Pro Image) leads on 4K output and multi-angle reference. Midjourney v7 leads on advertising aesthetics. Seedream 5.0 Pro and Flux Kontext lead on regional edits to an existing shot.
Are AI product photos legal for ecommerce listings?
In most jurisdictions, yes, with two caveats. Disclose when an image materially misrepresents the product, and do not composite identifiable real people or imply brand endorsements that do not exist. Check local ad standards — the US FTC and EU consumer protection rules both treat misleading product imagery as a compliance issue.
How much does an AI product photo cost vs. a studio shoot?
An AI-generated product image runs $2–$3 in 2026; a studio shoot runs $4,750–$20,000 per session or $25–$500 per image (TAMEYO Group, 2026; Nightjar, 2026). The cost case for AI is overwhelming at catalog scale. The studio case survives at brand-hero scale where reflective surfaces, color match, or real talent matter.
Wrapping Up
The right way to use an AI product photo generator in 2026 is as a catalog-scale production tool, not a studio replacement. Pick the model by job type: GPT-Image-2 or Nano Banana for text-heavy packaging, Midjourney v7 for aesthetic lifestyle spreads, Flux Kontext or Seedream 5.0 Pro for reference-image edits. Design every prompt around Amazon's pure-white main-image rule so the output ports across marketplaces. Reserve the studio for hero campaign work where reflection, colorimetry, or real people are load-bearing.
The teams getting this right are not the ones chasing a single best model. They are the ones with a written definition of done, a fixed brand style guide, and a reference-image-first workflow that keeps the SKU identical across every variant.
Start with the Product Image tool for the white-bg main image. Layer Marketing Poster once the listing expands into paid social.
Sources
- Hailuo AI, AI Product Photos: The 2026 Guide to Studio-Free Images, retrieved 2026-07-19, https://hailuoai.video/pages/blog/ai-product-photography-guide
- iGenUltra, AI Product Photography 2026: Studio Quality Without the Cost, retrieved 2026-07-19, https://www.igenultra.com/blog/ai-product-photography-tools-2026
- Nightjar, The Real Cost of Product Photography in 2026: A Breakdown, retrieved 2026-07-19, https://nightjar.so/blog/the-real-cost-of-product-photography-a-breakdown
- TAMEYO Group, AI Photoshoot vs Professional: 2026 Costs, retrieved 2026-07-19, https://www.tameyogroup.com/post/ai-generated-vs-professional-photoshoots
- Rewarx, AI Product Photography Statistics 2026, retrieved 2026-07-19, https://www.rewarx.com/blogs/ai-product-photography-statistics-ecommerce-2026
- GrabOn, 53 Crucial Ecommerce Product Photography Statistics (2026), retrieved 2026-07-19, https://grabon.com/blog/product-photography-statistics/
- Rajat AI, AI Product Photography Tools 2026: Cost & Workflow, retrieved 2026-07-19, https://rajatgautam.com/blog/ai-product-photography-guide-2026/
- Photta, The State of AI Product Photography in 2026, retrieved 2026-07-19, https://www.photta.app/blog/state-of-ai-product-photography-2026
- WiseGuy Reports, AI Product Photography Tool for E-Commerce Market 2035, retrieved 2026-07-19, https://www.wiseguyreports.com/reports/ai-product-photography-tool-for-e-commerce-market
- Amazon Seller Central, Product Image Guide, retrieved 2026-07-19, https://sellercentral.amazon.com/help/hub/reference/external/G1881
- SellerLabs, Amazon Product Image Requirements 2026, retrieved 2026-07-19, https://www.sellerlabs.com/blog/amazon-product-image-requirements-2026/
- UsePixora, Amazon Product Image Requirements 2026: Main Image Checklist, retrieved 2026-07-19, https://www.usepixora.com/resource/amazon-compliance-guide
- OpenAI, Introducing ChatGPT Images 2.0, retrieved 2026-07-19, https://openai.com/index/introducing-chatgpt-images-2-0/
- Masonry, GPT Image 2: Why It's the Most Reliable AI Model for Product and Brand Photography, retrieved 2026-07-19, https://masonry.so/blog/gpt-image-2-guide
- MindStudio, GPT Image 2: 10 Practical Use Cases for Businesses and Creators, retrieved 2026-07-19, https://www.mindstudio.ai/blog/gpt-image-2-use-cases
- Google DeepMind, Gemini 3 Pro Image — Nano Banana Pro, retrieved 2026-07-19, https://deepmind.google/models/gemini-image/pro/
- Google Blog, Introducing Nano Banana Pro, retrieved 2026-07-19, https://blog.google/innovation-and-ai/products/nano-banana-pro/
- Engadget, Google's Nano Banana Pro image generator leverages Gemini 3, retrieved 2026-07-19, https://www.engadget.com/ai/googles-nano-banana-pro-image-generator-leverages-gemini-3-for-improved-visuals-and-text-rendering-185505073.html
- The Right GPT, Midjourney Prompts for Product Photography, retrieved 2026-07-19, https://therightgpt.com/midjourney-prompts-for-product-photography/
- AI Tuts, Midjourney Prompts for Product Photography & Design, retrieved 2026-07-19, https://aituts.com/midjourney-product-photography/
- ByteDance Seed, Seedream 5.0 Pro 发布, retrieved 2026-07-19, https://seed.bytedance.com/zh/blog/beyond-generation-it-understands-design-introducing-seedream-5-0-pro
- Sina Finance, 豆包图像创作模型 Seedream 5.0 Pro 发布, retrieved 2026-07-19, https://finance.sina.com.cn/tech/roll/2026-06-23/doc-iniekqur9761230.shtml
- 302.ai, doubao-seedream-5-0-pro-260628 — API 价格、文档与测评, retrieved 2026-07-19, https://302.ai/product/detail/doubao-seedream-5-0-pro-260628
- Black Forest Labs, Image Editing — FLUX.1 Kontext Documentation, retrieved 2026-07-19, https://docs.bfl.ml/kontext/kontext_image_editing
- fal.ai, FLUX.1 Kontext [pro] API, retrieved 2026-07-19, https://fal.ai/models/fal-ai/flux-pro/kontext
Originally published by the PixMind Editorial Team: AI Product Photo Generator: Complete Guide for Ecommerce.
This adapted edition is organized for ecommerce operators who need a repeatable production workflow, not a model showcase. It focuses on listing requirements, reference fidelity, prompt structure, and...
AI image generators can produce a striking poster in seconds. The harder question is whether the result survives contact with a real campaign brief: a specific headline, a price, a date, a product name, and a layout that must work in more than one language.
That is where casual visual judgment breaks down. A poster may look polished at first glance while containing a substituted character, inconsistent punctuation, a distorted logo, or text that becomes unreadable after a mobile crop. To compare models fairly, teams need a repeatable test rather than a gallery of favorite outputs.
This article presents a compact rubric for evaluating multilingual poster generation. It is designed for practical selection work, not for declaring one permanent winner. Models and interfaces change, so the goal is to make each decision inspectable and reproducible.
1. Freeze one production brief
Start with a brief that resembles an asset your team might actually publish. Avoid a vague request such as “make a beautiful poster.” Define the content and constraints before opening any generator.
A useful test brief contains:
- one six-to-eight-word headline;
- one product or event name that must remain exact;
- a date, price, or percentage;
- a short call to action;
- a required visual hierarchy;
- one reference image for the product or character;
- a target aspect ratio and final display size.
Create localized versions in at least two writing systems. For example, pair English with Simplified Chinese, Japanese, Arabic, or Devanagari. Keep the meaning and information hierarchy equivalent even when line length changes.
The frozen brief matters because changing the wording for each model changes the test. Save the exact prompt, reference files, settings, and generation time alongside every output.
2. Score first-pass text accuracy
Judge the first output before repairing it. First-pass performance shows how much manual recovery a normal user should expect.
For every required text element, score four dimensions from 0 to 2:
- Character accuracy: 0 for unusable text, 1 for a small error, 2 for an exact match.
- Completeness: 0 when content is missing, 1 when partially present, 2 when every required element appears.
- Legibility: 0 when unreadable, 1 when readable only at full size, 2 when clear at the target display size.
- Hierarchy: 0 when the intended order is lost, 1 when partially preserved, 2 when headline, detail, and call to action are clearly differentiated.
Do not award points merely because a line resembles writing. Compare it character by character with the approved copy. Numbers, currency symbols, punctuation, diacritics, and full-width characters deserve the same scrutiny as letters.
Record the score before selecting a favorite. Otherwise, the strongest composition can quietly bias the reviewer into overlooking text defects.
3. Test script-specific failure modes
Different scripts reveal different weaknesses. The rubric should include checks that match the language rather than treating all text as Latin characters with a different font.
For Chinese and Japanese, inspect component structure, simplified-versus-traditional substitutions, accidental character fusion, and line breaks that separate a phrase unnaturally. For Arabic, check joining behavior, reading direction, punctuation placement, and whether glyphs change incorrectly in context. For Devanagari, inspect conjuncts, vowel signs, and marks positioned above or below the correct character.
Also check mixed-script content. Product posters often combine a Latin brand name with local-language copy, numerals, and symbols. A model may render each script acceptably in isolation but lose spacing or hierarchy when they share a layout.
If nobody on the review team reads the language, ask a fluent reviewer to validate it. Optical character recognition can help flag differences, but it should not be the only judge of linguistic correctness.
4. Measure reference fidelity separately
Text accuracy and image consistency are distinct problems. Score the supplied reference independently so that an attractive approximation does not hide unwanted product changes.
Check the silhouette, key colors, material, label placement, distinctive details, and proportions. For a person or character, check identity cues, clothing, accessories, and relative scale. For a packaged product, pay special attention to the boundary between generated campaign text and the label already present on the reference.
Use a simple 0-to-2 score for each required attribute. A result can then be strong in typography but weak in product fidelity, or the reverse. That is more useful than reducing everything to one subjective “looks good” rating.
5. Run one controlled correction
After scoring the first pass, allow one repair instruction. Keep the correction narrow: “Replace only the headline with the exact supplied Chinese text; preserve the product, lighting, layout, and all other elements.”
Compare the corrected result with the first output. Note whether the target problem improved and whether unrelated regions changed. A model that fixes one line but redesigns the product, face, or background creates hidden production work.
Track three recovery metrics:
- number of correction attempts;
- time to an approvable result;
- amount of collateral change outside the requested region.
This step often changes the decision. A model with a slightly weaker first pass may be the better production choice if it follows precise edits without disturbing approved content.
6. Test the delivery crop, not only the canvas
Export the candidate at its real destination size. Review it as a social thumbnail, mobile card, marketplace tile, or printed proof—not only inside the generation interface.
Check that essential text remains readable, safe margins survive platform cropping, the call to action is not clipped, and the product retains enough visual area. Test both high-density and ordinary displays when the asset will appear on the web.
A helpful rule is to mark every required element as “must survive,” “may move,” or “decorative.” This makes crop decisions explicit and prevents reviewers from protecting background decoration while sacrificing campaign information.
7. Keep an evidence table
For each model, preserve the first output, corrected output, exact prompts, settings, generation time, and raw scores. Add a brief reviewer note describing the most important failure in plain language.
The final comparison should show:
- text accuracy by language;
- reference fidelity;
- layout and crop survival;
- correction success;
- total attempts and time;
- estimated workflow cost.
Publish failures as well as successes when sharing the test internally. A single misspelled price or drifting product label teaches more about production risk than ten unrelated showcase images.
A compact decision rule
Before testing, define the threshold for the intended job. A campaign poster might require exact headline, date, price, and brand name; a concept mood board may tolerate imperfect incidental text. The same output can be acceptable for one job and unusable for another.
Choose the model that clears the required threshold with the lowest recovery cost—not necessarily the model that produces the most dramatic first image. This keeps selection tied to the work the team must deliver.
For a current example of a text-focused generation workflow, the Nano Banana Pro page on PixMind provides a useful place to run this rubric with multilingual copy, reference images, and natural-language edits. The framework also works with any other image generator that supports the same tasks.
The larger lesson is simple: multilingual poster quality is measurable when the brief, inputs, scores, and correction budget stay fixed. A small repeatable test gives design teams evidence they can revisit after a model update, instead of relying on memory or a polished demo.
Disclosure: I work with PixMind on AI image workflow and content evaluation. The rubric above is platform-independent, and the relationship is stated so readers can assess the example transparently.
Originally published on Medium.
AI image generators can produce a striking poster in seconds. The harder question is whether the result survives contact with a real campaign brief: a specific headline, a price, a date, a product nam...
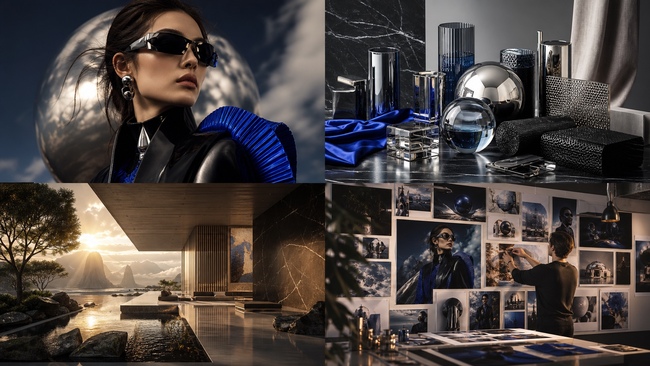
Choosing an AI image model from one impressive sample is unreliable. A better comparison treats each run like a small experiment: keep the creative brief stable, change one variable at a time, and score the outputs against the job you actually need to finish.
1. Lock the brief
Use one prompt with a clear subject, composition, lighting, aspect ratio and required text. Save the exact wording so every model receives the same task.
2. Freeze the references
If the job depends on a person, product or style, use the same reference set in every run. Changing references and models at the same time makes the result impossible to interpret.
3. Test one capability per round
Start with the base model, then test personalization, style reference or editing controls separately. For a Midjourney V8.2 migration, useful rounds are V8.1 baseline, V8.2 baseline, V8.2 with personalization, and V8.2 with SREF. Omni Reference remains a V7 workflow, so do not mix it into a V8.2 comparison.
4. Score the work, not the spectacle
Rate prompt adherence, composition, readable text, reference consistency and editability. A visually dramatic image can still be the wrong result if the headline is unreadable or the product changes shape.
5. Log the operational cost
Record generation time, failed attempts, credit cost and how many edits were needed before the asset was usable. This often matters more than a small difference in first-pass aesthetics.
6. Keep a decision record
Save the prompt, references, settings and a short reason for the winning model. The next campaign then starts from evidence instead of memory.
A practical Midjourney V8.2 migration checklist and worked comparison are available here: PixMind Midjourney V8.2 guide.
Choosing an AI image model from one impressive sample is unreliable. A better comparison treats each run like a small experiment: keep the creative brief stable, change one variable at a time, and sco...